PrimeBit Exchange Trading Guide & Tutorial: Everything You Need To Know
Bitcoin and altcoins leverage trading is becoming more and more popular. This is especially true in times of serious volatility when traders attempt to capitalize on the sudden market movements.
As such, there has been an influx of new Bitcoin margin trading exchanges, and PrimeBit is among them. Being relatively young, the exchange offers a comprehensive trading setup and an interface that’s relatively easy to use.
As it’s recently launched, the exchange doesn’t offer a large variety of cryptocurrencies to trade with. At the time of this writing, users can only open positions with Bitcoin (BTC), Ethereum (ETH), and Litecoin (LTC).
What it lacks in variety, however, PrimeBit compensates in high leverage options, as users can open up positions with as much as 200x leverage. It’s essential to know that leverage trading brings serious risks of capital loss and should only be carried out by people with sufficient experience and knowledge.
It’s also worth noting that PrimeBit supports a lot of different languages besides English, including but not limited to Deutch, Spanish, Japanese, Korean, Polish, Portuguese, Russian, Turkish, and so forth.
On top of that, users can also download the Meta Trader application if they don’t want to use the browser-based solution. It’s available for Windows, macOS, Android, and iOS.
How to Register on PrimeBit
Registering on PrimeBit is easy. The platform doesn’t require any identity verification that is rather beneficial for those who want to skip KYC and identity checks.
New users need to provide a valid email address where they will receive a confirmation message. After that, they only need to confirm and set up a password. No further actions are required. From here, traders need to deposit.
How to Deposit and Withdraw on PrimeBit
Depositing on the exchange isn’t complicated. First things first, users need to get to the Web Trader platform, which is done as soon as they log in to PrimeBit. Then, on the top right corner, there is a “Deposit” button.
![]()
Clicking it opens up a pop-up window where users have their BTC and USDT accounts on display. Creating an account happens through the main dashboard.
PrimeBit only allows deposits of Bitcoin and USDT, and no other cryptocurrencies or fiat is accepted.
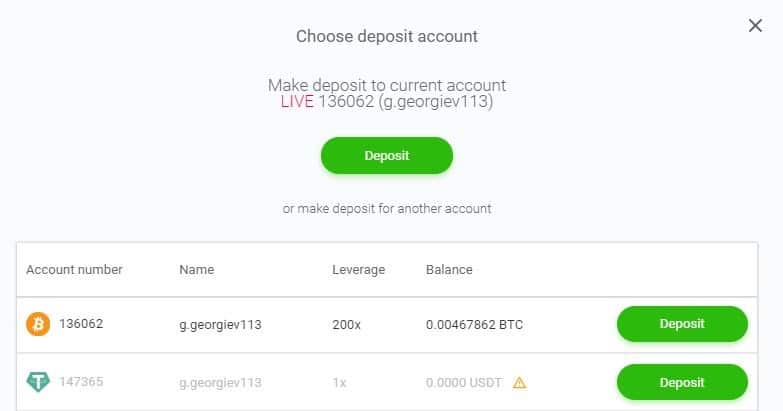
From here, it’s fairly straightforward. All that needs to be done is click on the “deposit” button, get the individual deposit address, and transfer the funds. Once this is done, trading can begin.
How to Trade on PrimeBit
Before starting to trade with real money, users might want to test the waters and see how the software works before they embark on leveraged trades. This is why PrimeBit also offers Demo accounts available in the Accounts Dashboard. On the top right corner of the interface, there is a drop-down menu where users can navigate through their different accounts and select “Demo” if they want to try the platform out without risking any money.
As soon as the account is funded, traders can begin placing orders. This is how the Web Trader looks on Desktop.
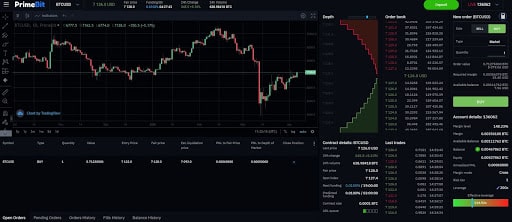
It’s worth noting that there is also a mobile version of the Web Trader so users can be present on the market even on the go. As seen in the above picture, we’ve already opened a position, and we’ll explain how this happens down below.
Overall, the interface is simple and easy to use. It’s intuitive, and it doesn’t require any prior trading knowledge to navigate. In the middle, there’s the trading chart. On the left side, there are different charting tools, while on the right side, there’s an order book and order types. This is where orders are placed.
PrimeBit has three different types of orders: Limit, Market, and Stop. Let’s walk through each one of them.
Please note that we are using a leverage of 200x. This is very high leverage, and it’s used for demonstration purposes. It’s highly recommended to carefully assess risk before using high leverage.
Limit Orders
Limit orders are used when traders want to open a position at a price different than the current market price.
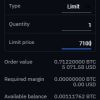
As seen in the picture, we want to open a position for one contract at $7,100, while the current market price is $7,124. As soon as the price reaches this point, the order will be triggered, and a position will be opened.
Below, there are the details of the order, including order value, required margin, available balance, and so forth.
Market Order
Market orders are the most common type as they are executed immediately at market prices, hence the name. (click on the image to enlarge).

Now, in this picture, we want to open a long position (buy) for one contract with a value of $5,071. We are using a leverage of 200x. Below the market order, users can change the level of leverage by clicking on the pen button.
Stop Order
Stop orders are used to determine an exit point in advance, which, when met, will see your position closed. They can be used to maximize profits (Take Profit) or to minimize losses (Stop Loss).
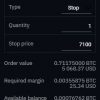
In this case, since we’ve opened a long position for one contract with an entry price of $7,122, we want to downsize our risk and set a stop-loss. We’ve chosen a price point of $7,100. As soon as the “sell” button is hit, the order will go live, and when the price reaches $7,100, it will be activated, closing our previous position.
How To Close a Position?
Closing a position can be done, as shown above – through the stop order mechanism. However, traders can also close their positions immediately.

Once the position is active, it will be displayed right under the chart section. Here, traders can monitor how their trade is performing, including unrealized profits or losses. This is also where traders can see their liquidation price – the point that will see their position automatically closed if reached.
On the far right side, there is a cross. This is how a position can be closed manually and instantly at the current prices.
Trading Fees and Contract Specs
The trading fees and the contract specs vary based on the cryptocurrency that traders choose to work with. Below is a table with the most important things to consider.
The fees are constant and as it follows:
Maker fee: -0.0250%
Taker Fee: 0.0750% Based on the amount of leverage used, the maximum position size that traders can open varies. The below chart summarizes it all for the currently available cryptocurrencies.

Customer Support on PrimeBit
Another particularly important component of a well-functioning cryptocurrency exchange is customer support.
We’ve opened a ticket for assistance with their Web Trader, and the customer support team got back in less than 15 minutes, which is quite impressive.
While the current volume on the exchange isn’t high, hinting at a smaller user base, hopefully, things will remain unchanged as PrimeBit’s users increase.
Conclusion
All in all, PrimeBit offers a fairly intuitive and straightforward trading experience. The software is easy to use. The leverage is very high, perhaps even among the highest in the industry. On the flip side, the variety of cryptocurrencies is very limited, which won’t allow traders to capitalize on altcoin seasons. The trading volume is relatively low, but that’s easy to understand, given the fact that PrimeBit is a fairly new exchange.
The post PrimeBit Exchange Trading Guide & Tutorial: Everything You Need To Know appeared first on CryptoPotato.


