How To Set Up RoninDojo Tanto, A Powerful Privacy Tool For Bitcoin Transactions
Walking through complete setup of the RoninDojo Tanto, a plug-and-play Bitcoin full node enabling premium Bitcoin transaction security.
If you are not running your own Bitcoin node, then you are trusting someone else’s.
RoninDojo is a free and open-source software (FOSS) developer team focused exclusively on building the most stable and tailored full Bitcoin node for Samourai Wallet support. With Samourai Wallet and RoninDojo combined, users are empowered with a mobile-first Bitcoin wallet that features privacy-enhancing tools like a Whirlpool CoinJoin implementation and post-mix collaborative spending tools; all powered by the user’s own self-hosted Bitcoin full node communicating with the mobile client over Tor.
This guide demonstrates setting up a new plug-and-play full Bitcoin node from RoninDojo called the Tanto.
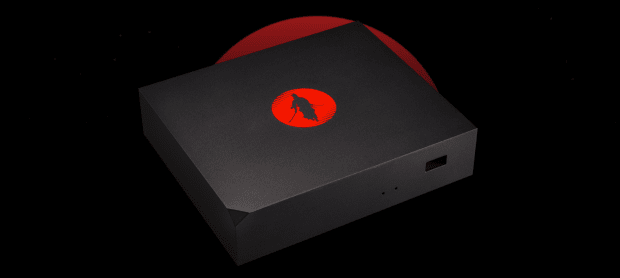
The Tanto comes pre-assembled and preloaded with the RoninDojo software, there is no need to build a material list and order several pieces of hardware from multiple vendors.
The Tanto features a milled-aluminum case and the fanless design makes this the quietest node you’ll ever run. The outer case is painted black with a sleek RoninDojo logo in red. Inside the case, the Tanto is powered by a ROCKPro64 board, an interface card, and an M.2 NVMe 1 terabyte (TB) SSD. The Tanto also includes a 32 gigabyte (GB) microSD card preloaded with the RoninDojo software image and power supply.
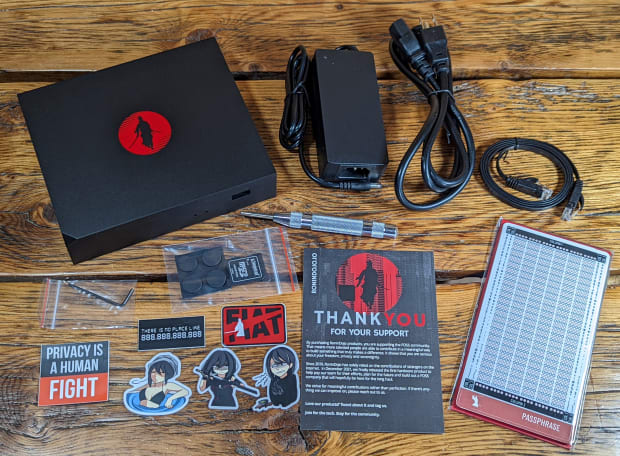
Everything you need to get started is included. All together the Tanto includes:
- Aluminum case & bottom plate
- Ronin X4-90 adaptor
- LED stripe with GPIO connectors (upgraded to multi-color PCB board LED with batch two)
- Thermo pad, rubber feet, screws and hex wrench
- ROCKPro board
- ROCKPro64 PCIe X4 to M.2/NGFF NVMe SSD interface card
- Power supply
- M.2 SSD M-key (1 TB)
- 32 GB microSD card
- RoninSteel backup kit
- Spring-loaded punch
- Ethernet cable
- Sticker pack
- “Thank you” card
There are a couple of upgrades in the works for both the Tanto hardware and the RoninDojo user interface (UI) software:
- The URL for the Whirlpool graphical user interface (GUI) will be available through the dashboard web interface so that you no longer have to access it through the SSH terminal.
- The LED strip installed on the front of the Tanto will be upgraded to a custom LED PCB board which features not only the current red color, but also green and blue to offer different kinds of status indicators in future releases. This upgrade will be included in all batch two Tantos. For batch one Tanto owners, this upgrade will be shipped free of charge. Here is what the upgraded LED PCB board will look like — the final product will be colored black to match the Tanto:

Additionally, the Tanto includes the RoninSteel stainless steel seed phrase backup plate. Check out this guide to see a demonstration of the RoninSteel.
Here are a few highlights to give you an idea of what it is and how it works:
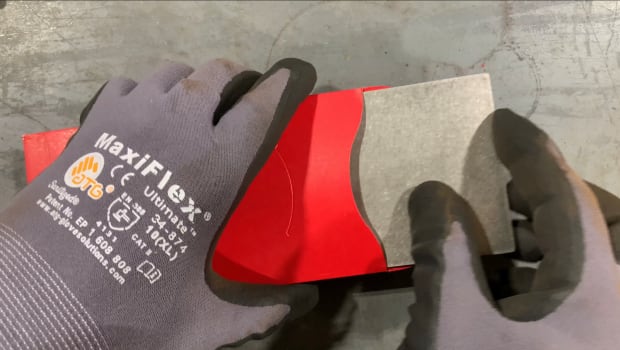
Each RoninSteel kit includes the blank steel plate and multiple template stickers for the seed phrase and passphrase (one for each side of the plate). The characters can be marked with permanent marker first and then stamped with the included spring-loaded punch.
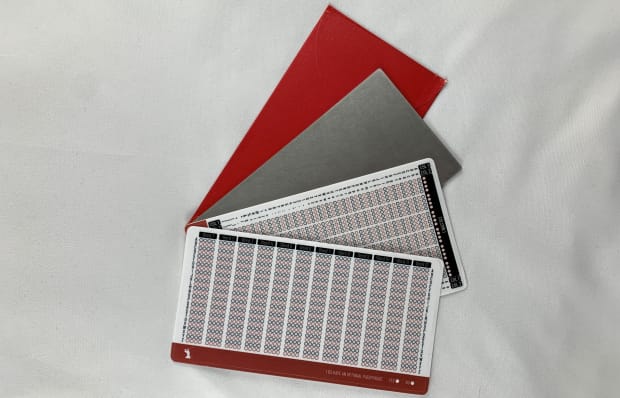
Then the sticker can be peeled off so that the information stamped on the plate is unknown without using another template sticker for the recovery process. This way, if anyone finds your backup plate, then they will not know the information it contains.
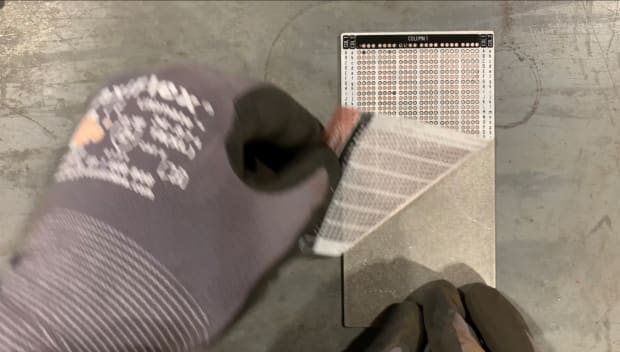
There is also a tamper-evident envelope included so you can rest assured that no one has accessed the plate. The plate is also subjected to a fire test in the full guide.
Unboxing
The Tanto ships in an inconspicuous brown box with no logos, stickers or anything indicating that there are Bitcoin-related contents within. The box measures 8 centimeters by 20 centimeters by 40 centimeters and weighs a little more than 1 kilogram.

Inside the brown box there are two black boxes, these contain everything that is included.

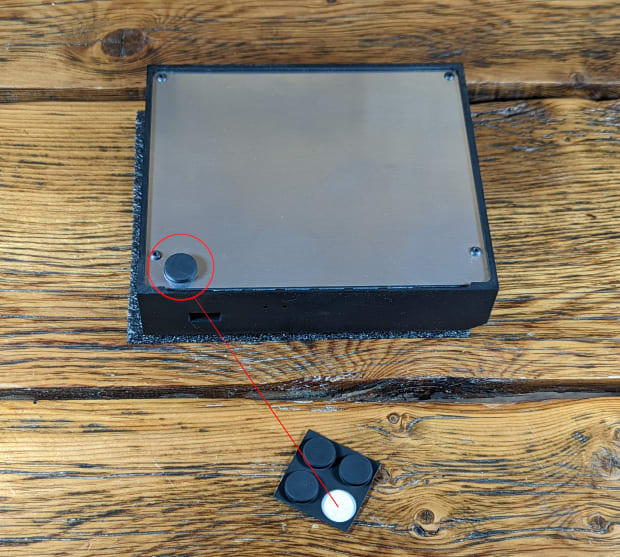
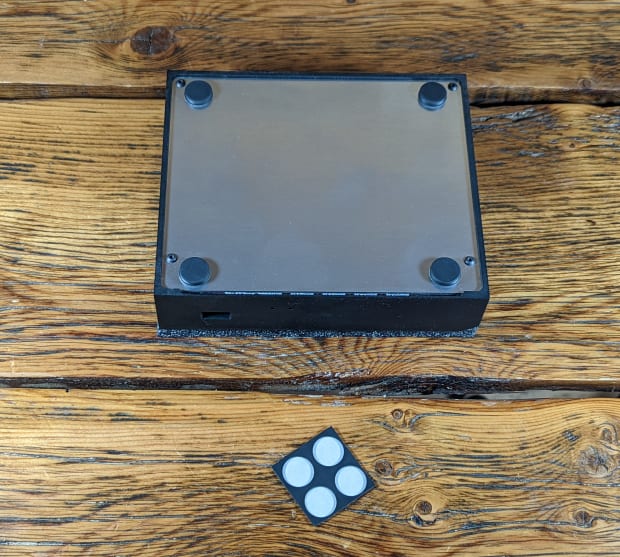
You can flip the Tanto over and apply the adhesive rubber feet to the four corners of the bottom plate.
Then you are ready to connect the Tanto.
Connecting
Connecting the Tanto is very simple:
- Plug one end of an Ethernet cable into the back of the Tanto
- Plug the other end of the Ethernet cable into your router or switch
- Plug in the power adaptor
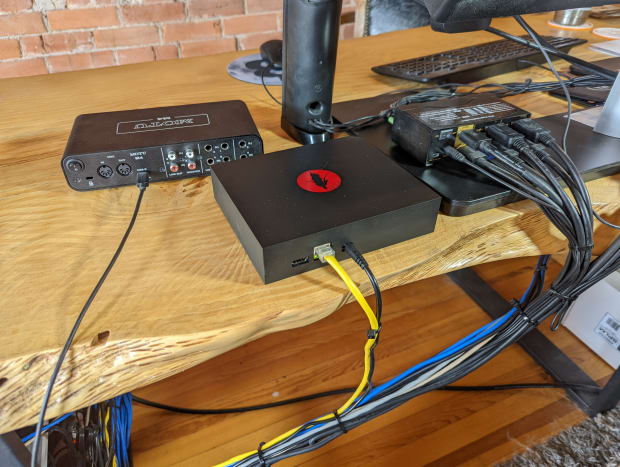
Next, just plug one end of the power cable for the included power supply into your outlet and the other end into the transformer.
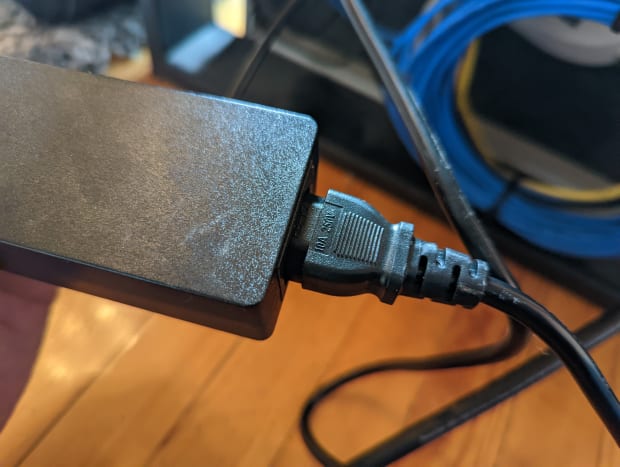
The Tanto will automatically power on and start the initial configuration process. Ensure that the power is not interrupted during the automatic initial configuration process. This process takes roughly 10 minutes and you will notice the red light illuminate underneath the Tanto once this process is finished. Then, you will be ready to log in to the Tanto through the web interface.
Configuring
Configuring the Tanto is also very easy, it only takes a few minutes and the basic steps are to set your password then login. Visit the official RoninDojo Wiki for detailed instructions and more.
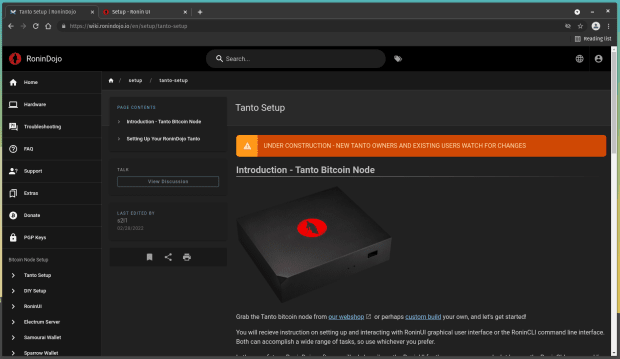
Using a PC connected to the same local network as your Tanto, open your favorite web browser and type “https://ronindojo.local” into the URL bar. This should bring up the RoninDojo welcome page.
If that did not work, then you can achieve this same process by using the local IP address of your Tanto instead. This IP address can be found by logging into your router and checking the list of devices under the Dynamic Host Configuration Protocol (DHCP) leases section. Your router should have the local IP address needed to log in, along with the password on a label somewhere on the device. If not, the directions are usually pretty easy to find with an online search for your manufacturer’s router.
Typically, you can just type “192.168.0.1” or “192.168.1.1” or “10.0.0.1” into your web browser and that will bring you to your router login page. From there, the username/password can vary depending on manufacturer but they are usually something like “admin/admin” or “admin/1234” or “admin/password.” Alternatively, programs like AngryIP may be used.
In this example, the local IP address “192.168.69.17” is the one used to type into the URL bar.
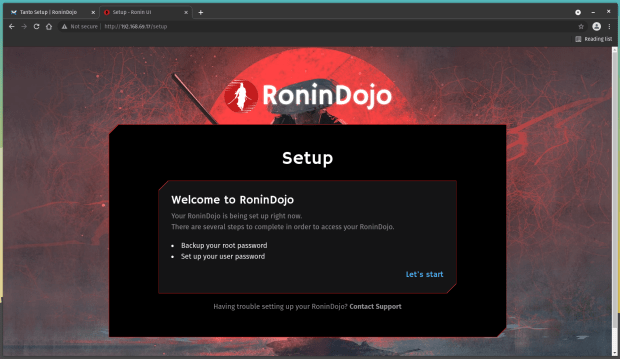
Once you are at the RoninDojo welcome page, select “Let’s start.”
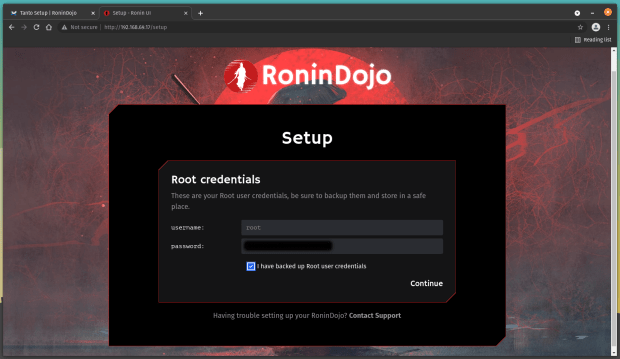
You will be presented with your root credentials, these are like the master username and password for the Tanto’s backend. Save these details in a secure place like a password manager and do not share these with anyone for any reason. You cannot change these, they are pre-selected for you. Ensure that you select the box that says “I have backed up Root user credentials,” then click on “Continue.”
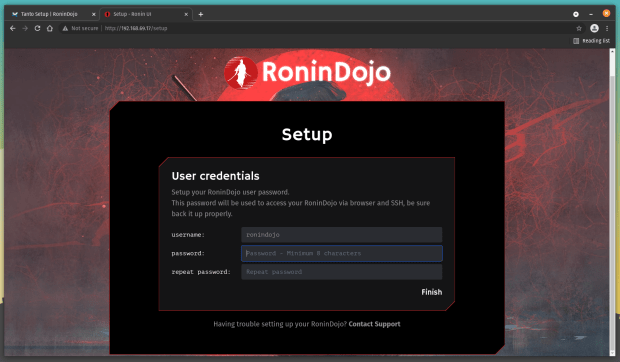
Next, you will set your user credentials — these are the ones you will use to access the Tanto through the web interface. The username is pre-selected for you, “ronindojo.” You can create any password you would like to use, just ensure it is at least eight characters. Repeat this password and make sure you secure these credentials in a safe place like a password manager and do not share them with anyone for any reason. Then click on “Finish.”
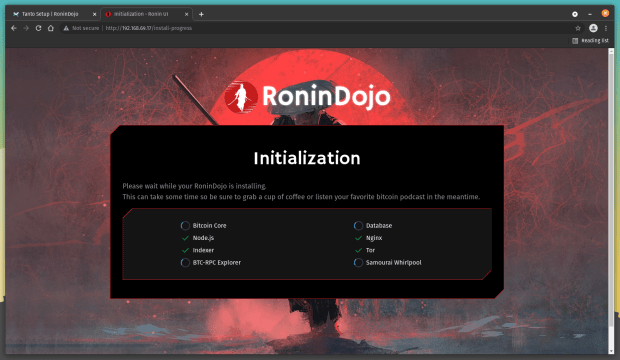
Next, you will see several services such as Bitcoin Core, Node.js, Indexer, BTC-RPC Explorer, Database, Nginx, Tor and Samourai Whirlpool start. This takes a few minutes.
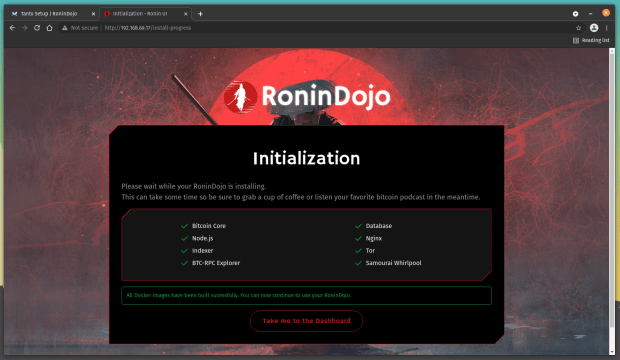
Once there is a green check mark next to each service, you can click on the “Take me to the Dashboard” button.
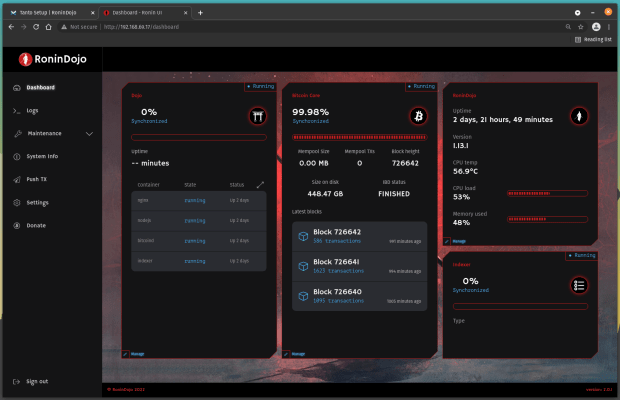
Once you are at your dashboard, you can see the progress of the Bitcoin initial block download (IBD) and the vitals of your Tanto. The IBD will take about three days to complete, the Tanto is connecting to other Bitcoin nodes and downloading the entire Bitcoin blockchain, all the way back to the first block from January 2009. Once the IBD completes, you will have your own full copy of the blockchain and you will use your own copy against which to verify your transactions.
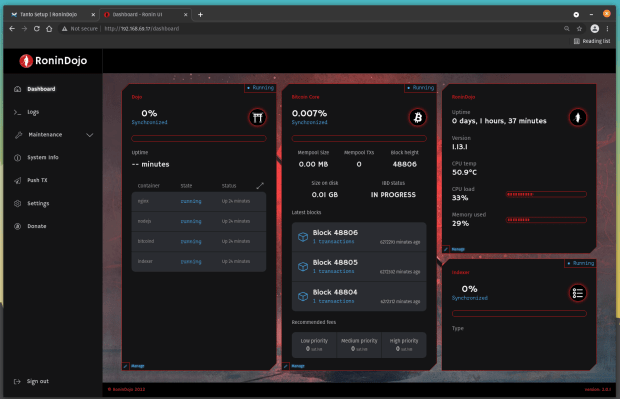
Some other vitals you can monitor are uptime, version, temperature, CPU load and memory usage. Let this process run for a couple of days. Tanto will log you out automatically after some idle time but the processes continue to run in the background.
The IBD took a total of two days, 21 hours and 49 minutes in this demonstration.
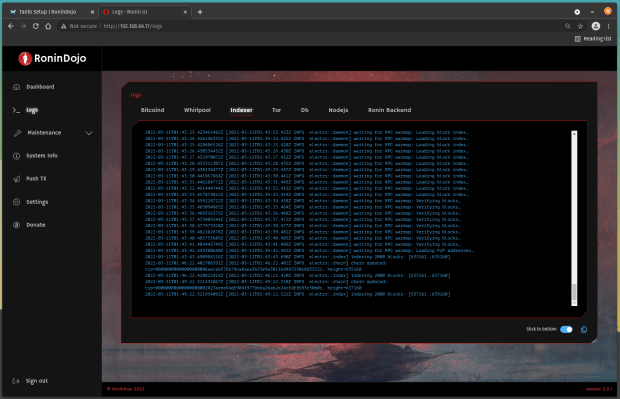
Now that the entire Bitcoin blockchain has been downloaded, it needs to be indexed so that it is searchable. The indexing process begins automatically once the IBD is finished, and this process can take an additional day. You may notice that the indexer status in the lower right-hand corner remains at 0%… don’t panic! Simply navigate to the “Logs” option on the left-hand side menu and then the “Indexer” tab. You should see something like what’s depicted in the screenshot below, where the blocks are getting indexed in chunks of 2,000. Just let this process run to completion — again, this can take another 24 hours.
Once the indexer has caught up to the latest block height, you should see both indexer and Dojo reporting 100% synchronization.
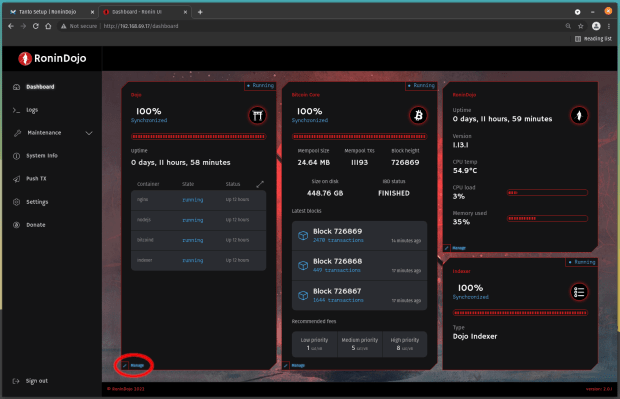
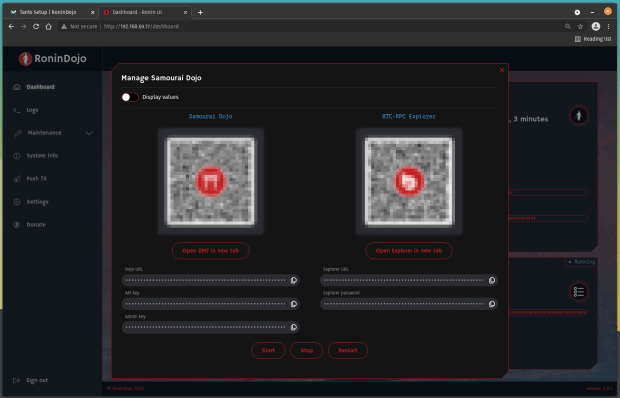
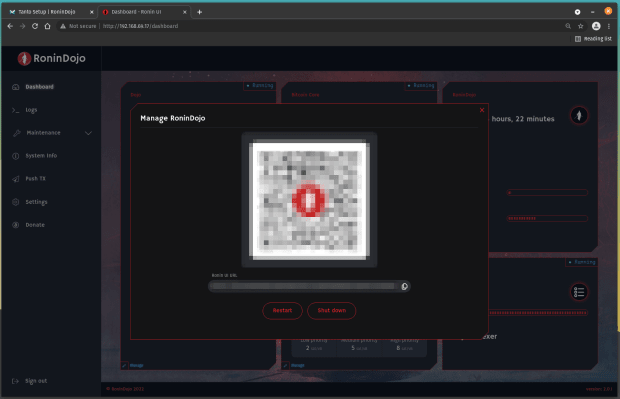
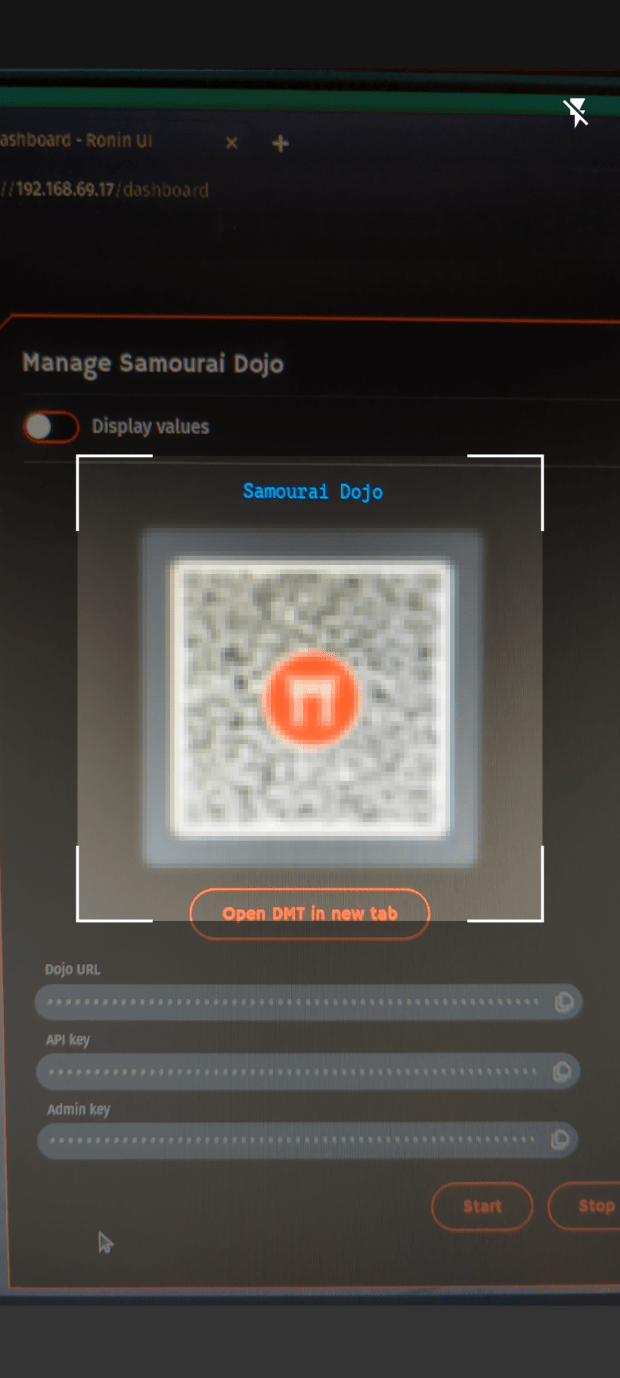
You can click on “Manage” in the lower left-hand corner of the “Dojo” window and this will bring up the QR code that you can use to connect your Samourai wallet (setting up Samourai wallet will be covered in the next section).
Make sure to toggle “Display values” to make the QR codes legible. The other QR code is for connecting your own BTC-RPC explorer. The explorer provides a way to use your own Dojo to feed data to a full-fledged Bitcoin blockchain explorer over Tor. Copy the .onion URL and password for the explorer, paste into Tor browser, leave the username blank and bookmark the page.
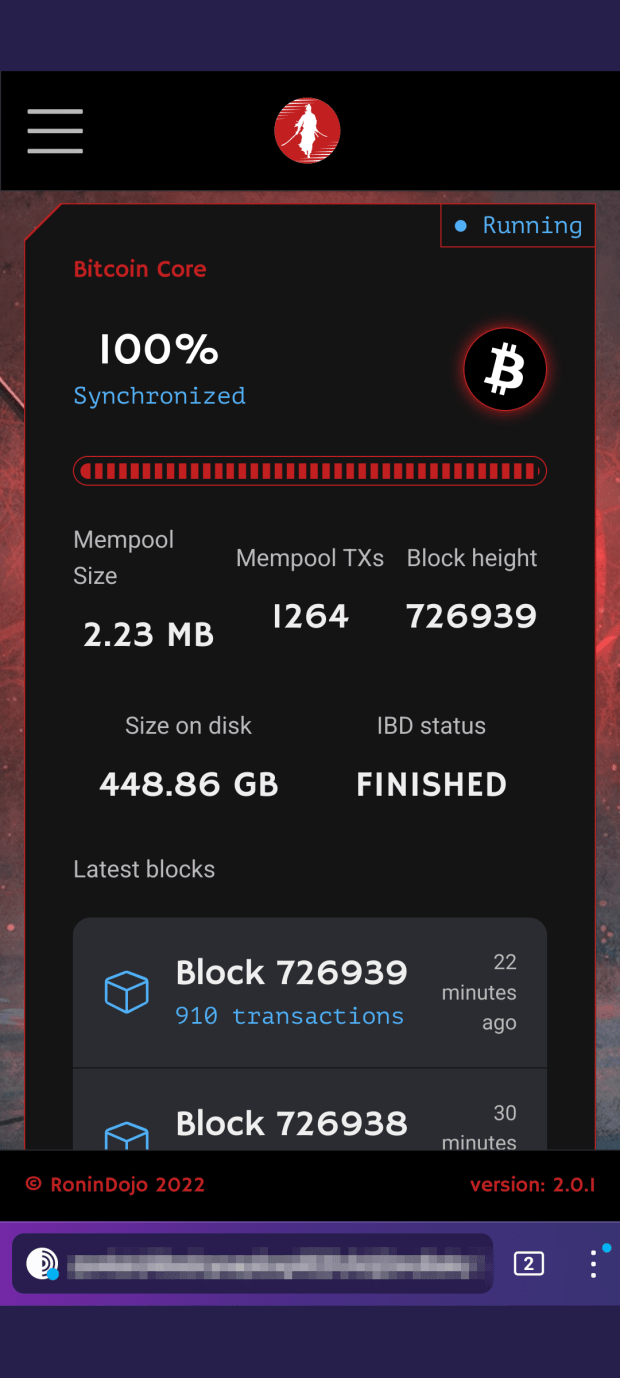
You can even log into your RoninDojo UI from your mobile phone with the Tor Browser. From the dashboard, click on “Manage” in the lower left-hand corner of the “RoninDojo” window. This will bring up a QR code that you can scan to follow the .onion link to your RoninDojo UI. Then enter your RoninDojo UI password and bookmark this page.
Once you are logged into your RoninDojo UI on mobile, you can just copy/paste the .onion URL and password for the explorer into your Tor browser as well, then leave the username blank. You can bookmark this page as well and now you have a mobile block explorer that uses your own Dojo as a backend and communicates with it via Tor.
Connecting Samourai Wallet
This section will demonstrate how to install and set up a new Samourai Wallet on Android. Samourai Wallet is a mobile-first, privacy-focused Bitcoin wallet. Some of the privacy-enhancing tools built into Samourai Wallet include:
- Whirlpool, a zero-link CoinJoin implementation
- BIP47, a reusable payment code protocol
- PayNyms, unique identifiers that can be used to connect with peers for collaborative transactions
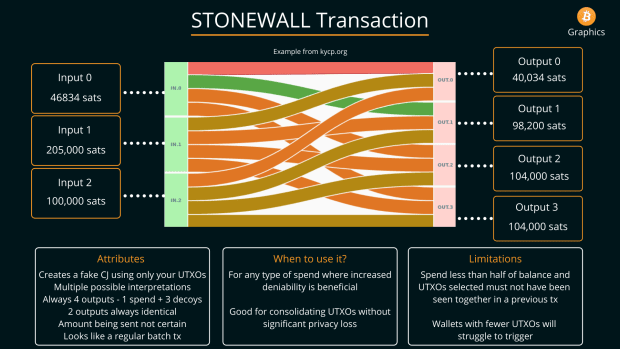
- Stonewall, a post-mix spending tool that breaks on-chain heuristics
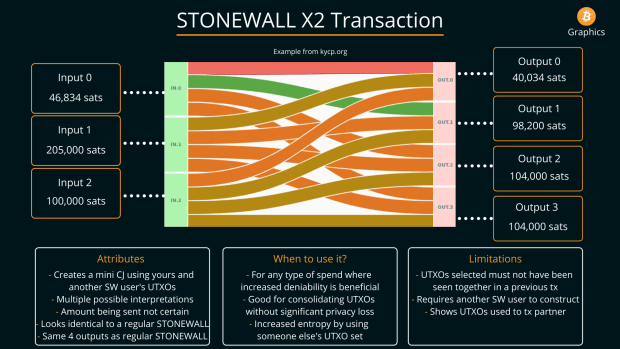
- Stonewallx2, a post-mix spending tool that looks identical to Stonewall on-chain but is actually made with two peers
- Stowaway, a post-mix spending tool that obfuscates the amount being spent
- Ricochet, a post-mix spending tool that adds additional hops between the final payment destination
- Advanced coin control
- Separate wallets for deposit, pre-mix and post-mix bitcoin
Using Samourai Wallet in connection with your own RoninDojo full node provides you with a powerhouse of private mobile Bitcoin tools. Before you get started, it will help to have a recovery sheet or notebook to write your seed phrase and passphrase information.
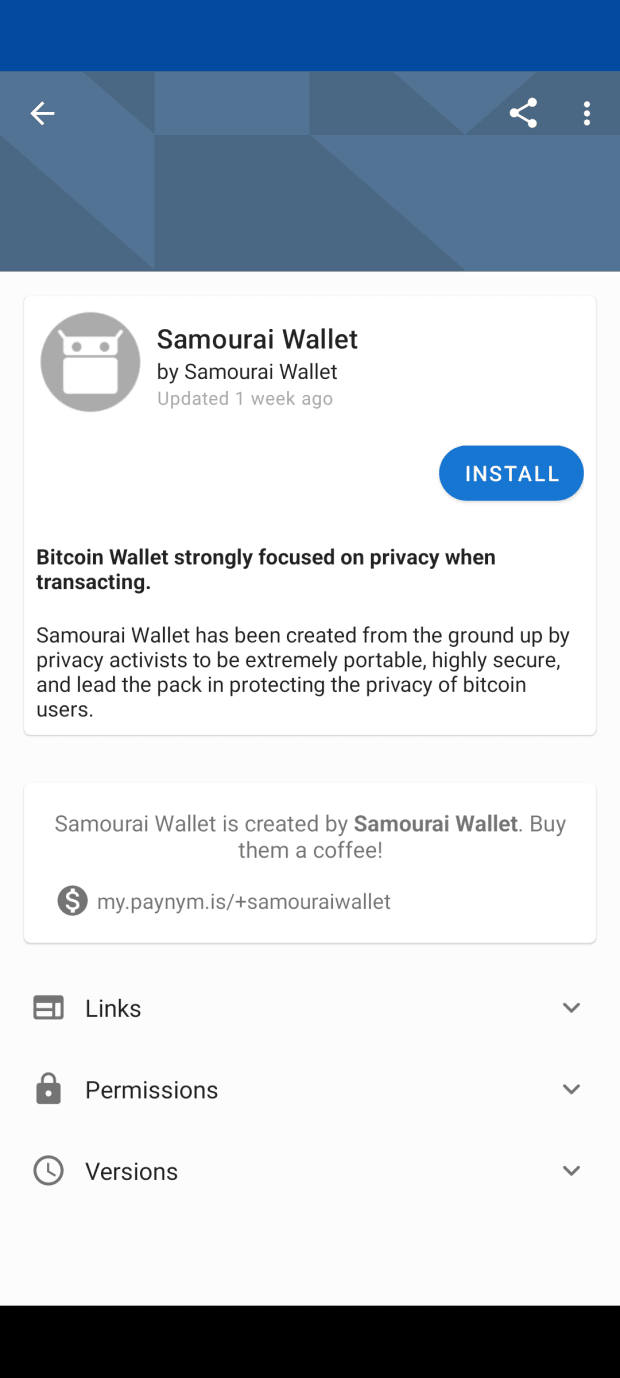
You can download the Samourai Wallet application from an F-Droid repo, its website or the Google Play store.
Simply install the application and follow the on-screen system prompts. Once you launch the application, select “MAINNET.”
Next, you will be greeted with a helpful on-boarding presentation.

Next, you will be asked to choose a directory to store your encrypted wallet backup file. Then allow system access.
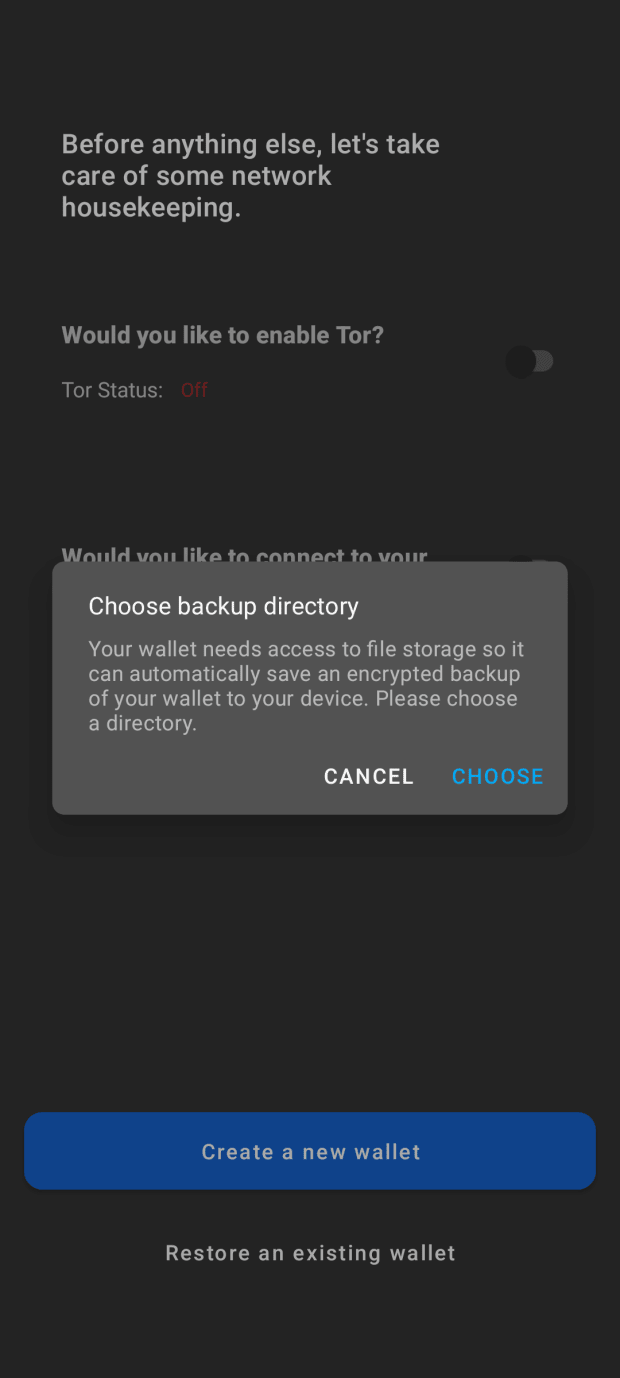
Next, you can toggle on the option to enable Tor. Then toggle on the option to connect to your own Dojo. Then click on “Scan QR” and the application will ask you to grant camera permission.
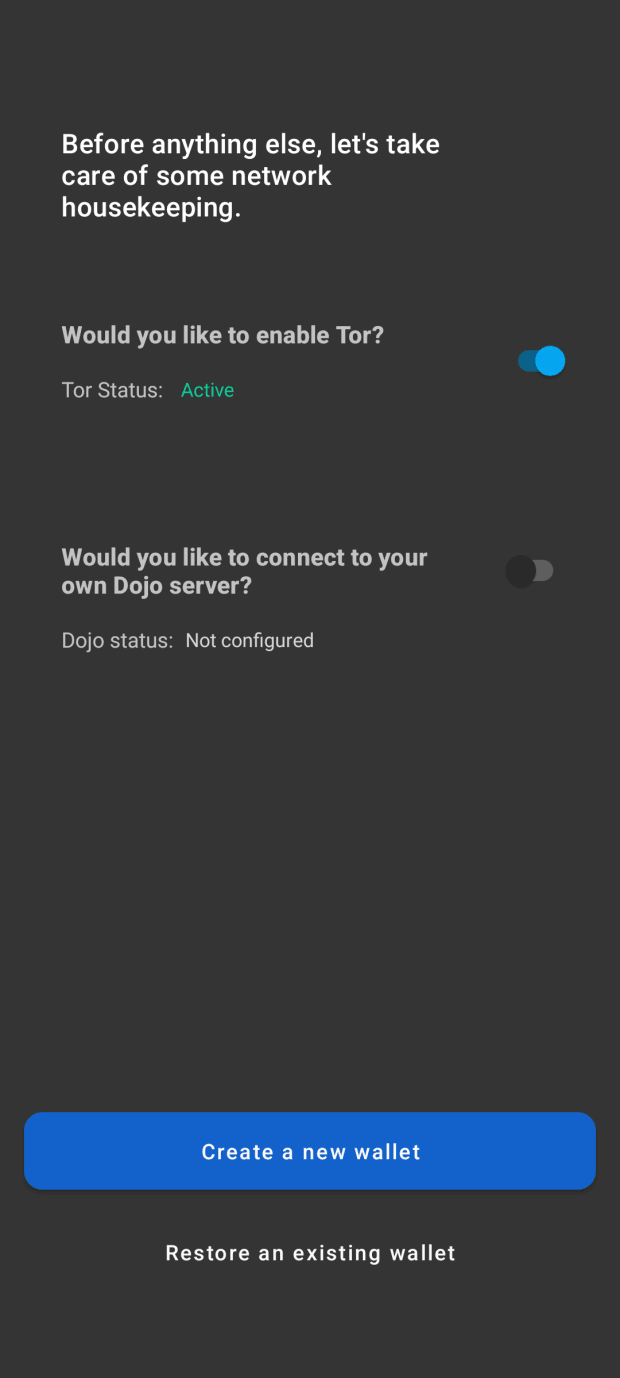
This is where you want to select “Manage” in the lower left-hand corner of the “Dojo” window in your RoninDojo UI dashboard. Make sure you have toggled on visibility. Then scan the “Samourai Dojo” QR code from your mobile device. Once the details are received by the application, press the “Create a new wallet” button in Samourai wallet. Or if you have a wallet to import, then select the option to “Restore an existing wallet” instead.
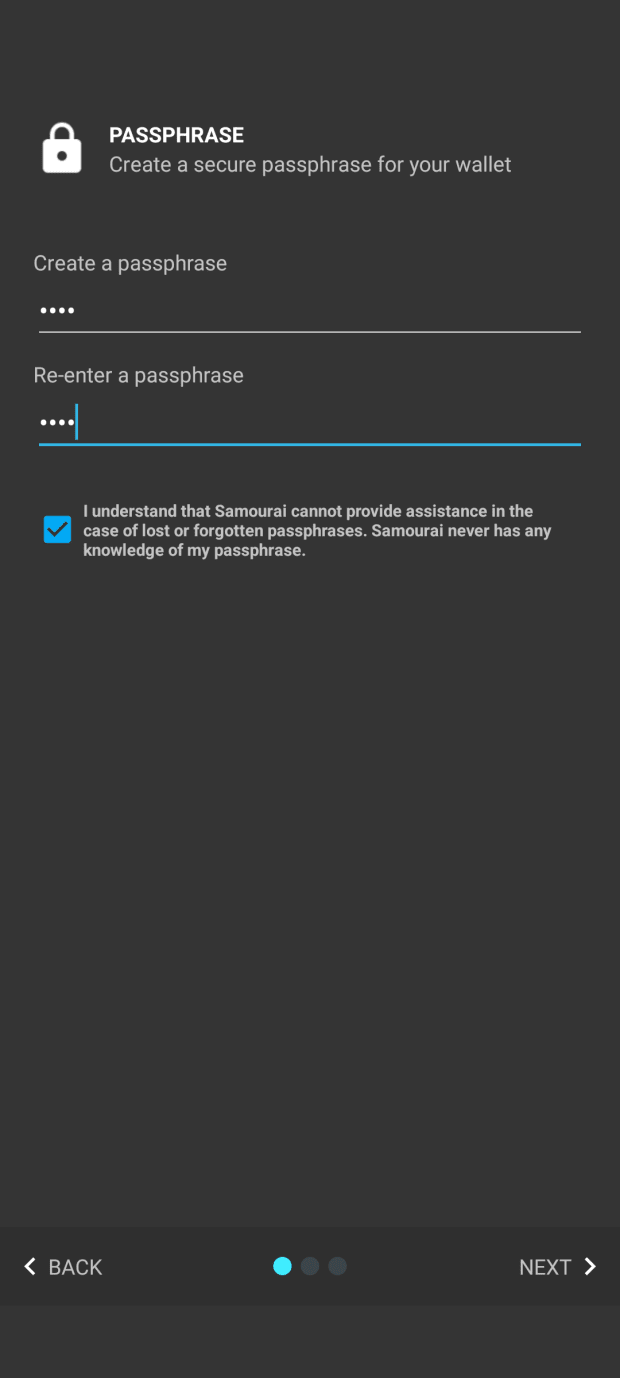
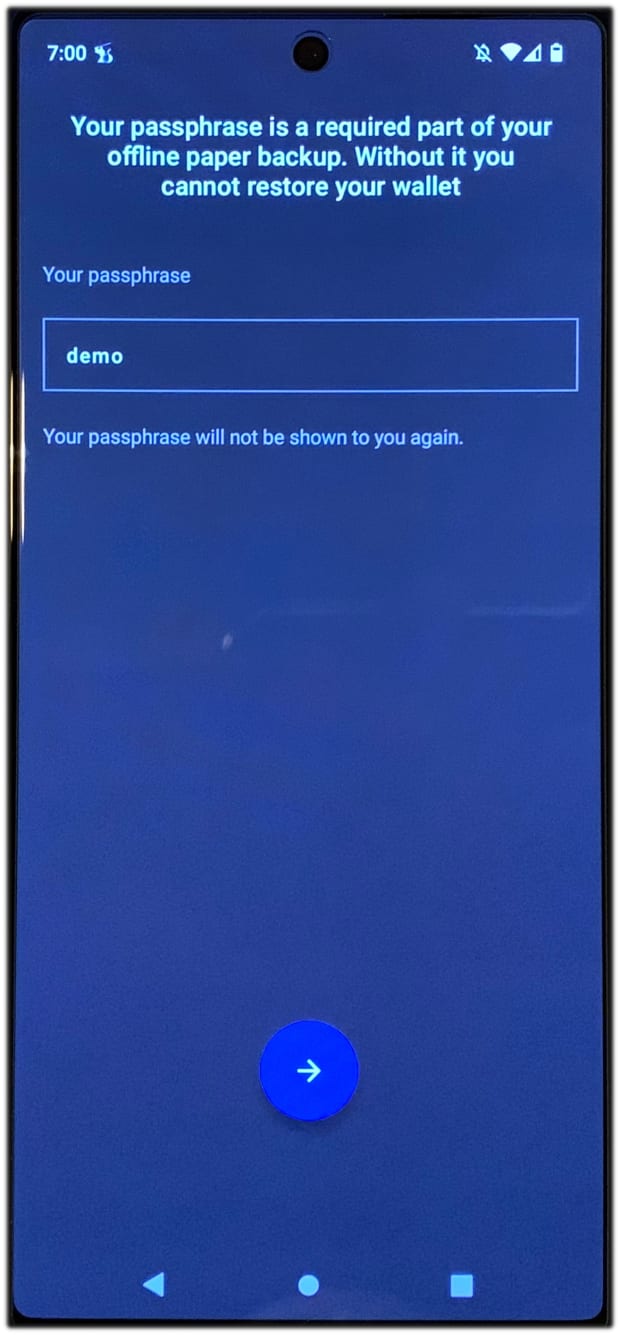
Next you will be asked to create a passphrase. Using a strong, high-entropy passphrase will help protect your bitcoin in the event that your 12-word seed phrase is ever compromised. Check the box that says you understand that no one can help you recover a lost or forgotten passphrase. Keep in mind too that any passphrase you enter will generate a completely different wallet, so make sure you are writing this down correctly and double checking your work.
If you ever need to restore your wallet and you enter a passphrase that is off by even a single character then it will generate a completely different wallet. Then the app will ask you if you would like to download the recovery sheet.
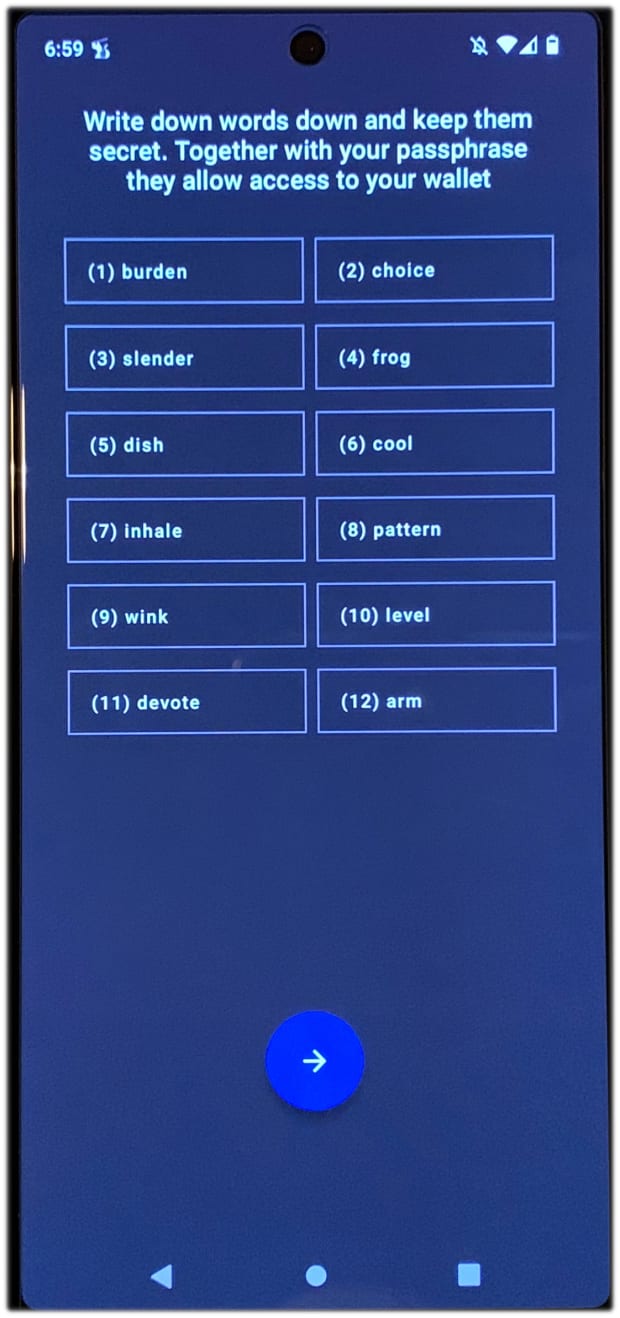
The next screen will present your 12-word seed phrase. Do not share these words with anyone for any reason. These 12 words are a human-readable representation of your Bitcoin private key. Anyone who gains access to these words and this passphrase can take your bitcoin. Do not take a screenshot of these words. Do not take a picture of these words. Do not save them in a text file or other digital format. Make sure you write these down in order and then secure this seed phrase like it was cash, gold or jewelry. Many people choose to stamp their wallet recovery information (seed phrase and passphrase) into metal that can withstand extreme environments such as fire and flooding. You can find further information on this topic here.
Then you will be asked to confirm the passphrase you entered and then create a PIN. The PIN will be required to access the Samourai Wallet application, so use a strong PIN that is not easy to guess or the same as your primary phone access PIN.
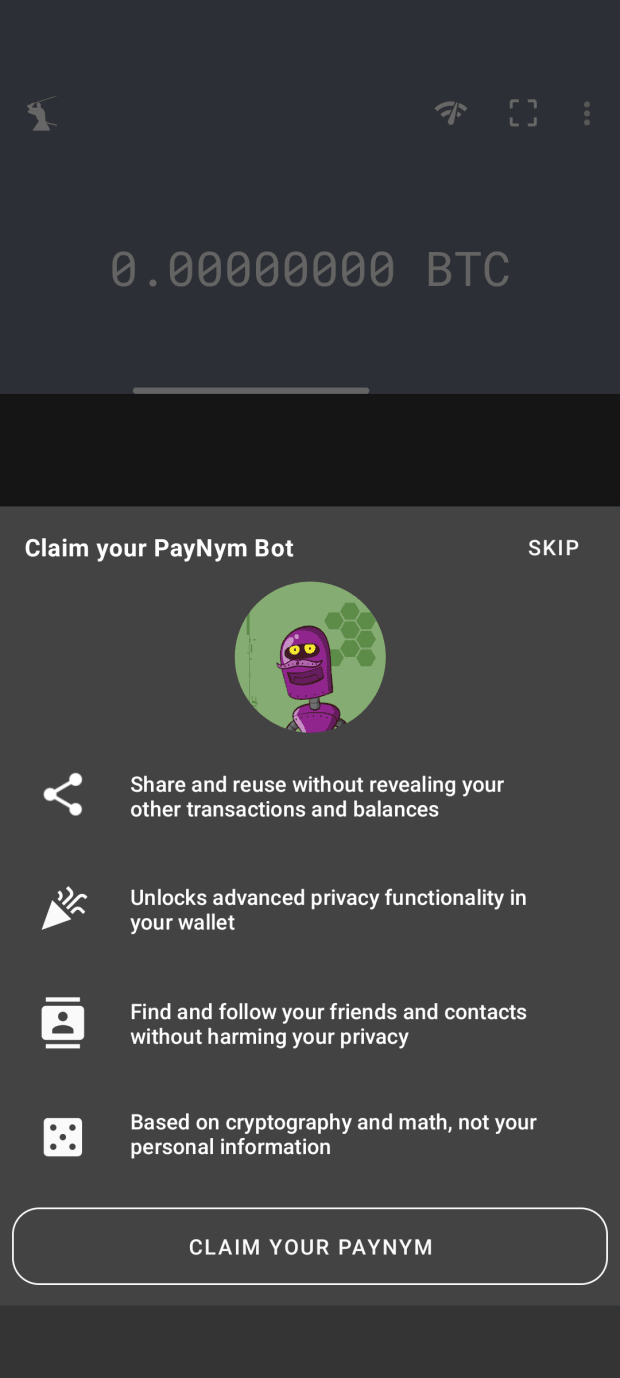
Finally, you will be presented with your unique PayNym — you can claim it so that others can easily connect with you. Then you will be at the home screen, you can click on the blue “+” sign to see options for Whirlpool, send, receive and PayNym. The receive option for example is where you can generate new Bitcoin addresses.
Now you have a mobile Bitcoin wallet with built-in privacy tools that communicates with your very own self-hosted full Bitcoin node over Tor. Congratulations, this is a major step along the path to sovereignty.
Connecting Whirlpool
This section will demonstrate how to connect the Whirlpool desktop client to your Tanto full node and your Samourai Wallet. With this configuration, you will be able to have your UTXOs mixing non-stop in the background from your desktop client and powered by your own full node. When you mix from mobile only, the mixing stops as soon as you shut down your mobile Whirlpool client in Samourai Wallet.
First, you will need to download the Whirlpool client appropriate for your operating system. The different options along with accompanying developer signatures can be found here and detailed installation instructions can be found here. Be aware that you will likely need to install OpenJDK as well, which is covered in the installation instructions.
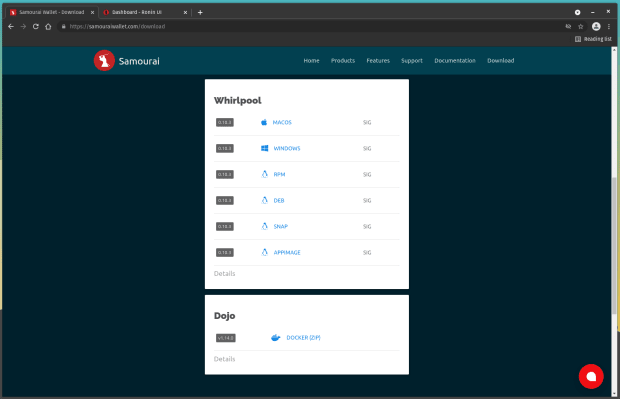
*In a future release of the RoninDojo UI, the Whirlpool URL will be available from the web interface dashboard and you will no longer need to retrieve this information from the terminal as demonstrated here.
Once you have your Whirlpool client installed and your Samourai Wallet connected to your RoninDojo Tanto, you can make an SSH connection to the RoninDojo and start the Whirlpool service. The SSH connection can be made with the same username/password you used for the RoninDojo UI.
Once connected, navigate to “Samourai Toolkit” then “Whirlpool”:
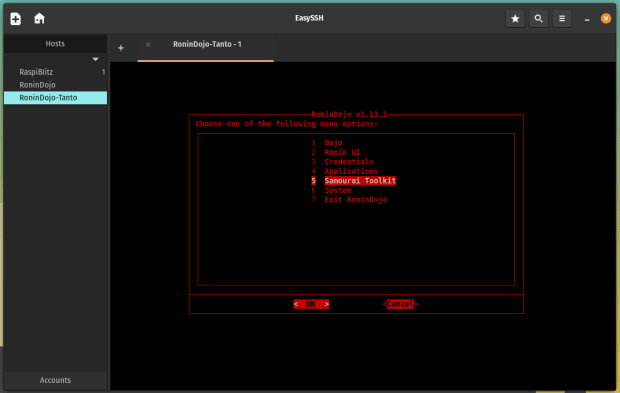
Then select “start,” and a script will run briefly and then you can hit any key to return to the main menu when prompted.
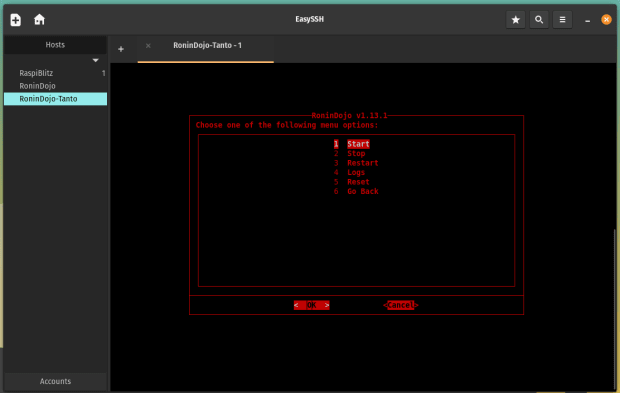
With the Whirlpool service started, and back at the main menu and now navigate to “Credentials” then “Whirlpool.”
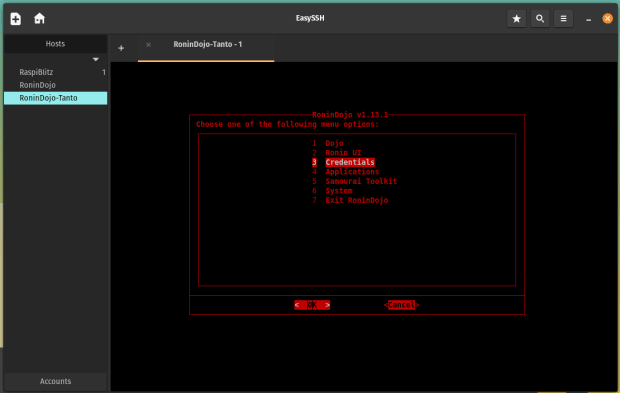
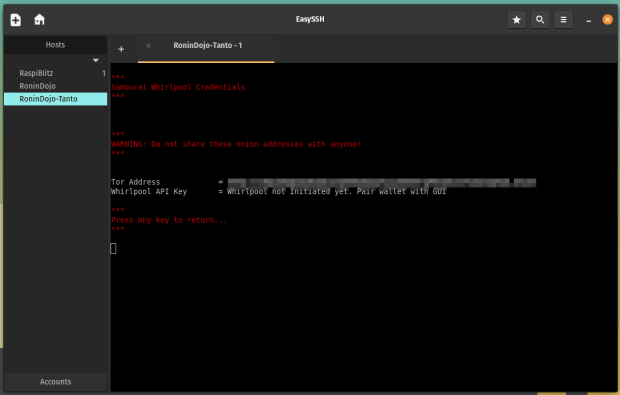
This is where you can retrieve the .onion URL you need to use in the Whirlpool client GUI to get it configured. Highlight this URL and use “ctrl+shift+c” to copy it to your clipboard.
Now open the Whirlpool client application you installed earlier. Select the “Advanced: remote CLI” option and where it says “https://my-cli-host:8899” paste the .onion URL from your RoninDojo terminal. Depending on whether or not you’re running a Tor daemon or just the Tor browser, you may need to select either “9050” or “9150” for appending the Tor proxy. Leave the API key blank, this will automatically be handled once initialized. Then click on “Connect.”
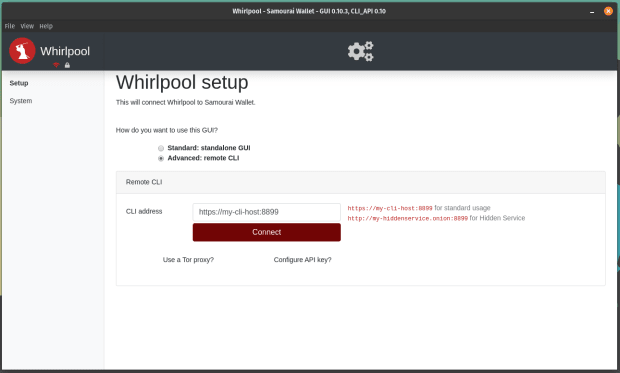
Give the GUI some time, Tor connections can take a little while. You may need to try this a couple of times before the connection is made. But once the connection is made, you will be presented with a screen asking you to input the Whirlpool pairing payload from your Samourai Wallet.
In Samourai Wallet, click on the three-dot menu in the upper right-hand corner and select “Settings” then “Transactions” then “Pair to Whirlpool GUI” at the bottom. This will display a QR code that contains your Whirlpool payload. Simply click on the QR code option in the desktop GUI and this should launch your webcam then hold up the QR code on your mobile so the camera can scan it.
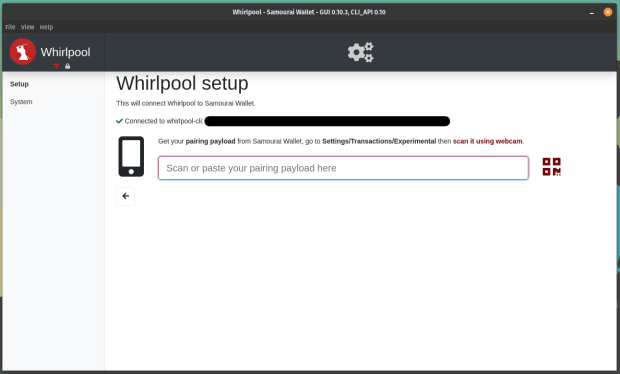
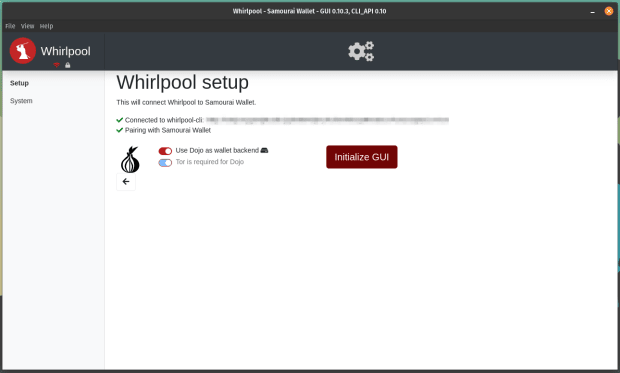
Once received, click on “Initialize GUI.”
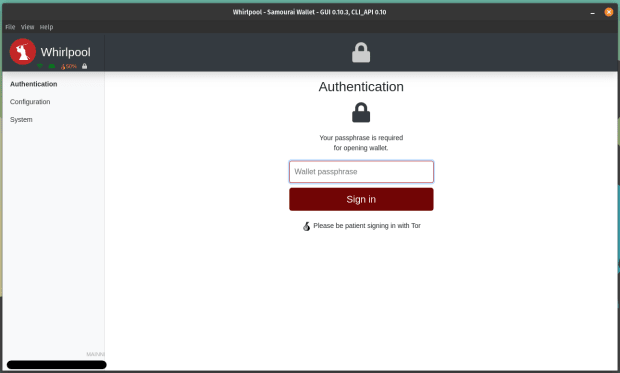
Next, enter the passphrase for your Samourai Wallet and click on “Sign in.”
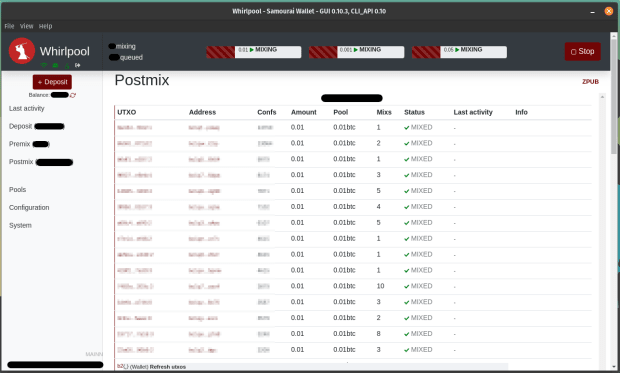
Once signed in, you should be able to see your balances and mixing activity and then you can set targets for how many mixes you wish to achieve. You can even generate deposit addresses from the Whirlpool GUI.
If you have received bitcoin that you would like to mix, simply follow these steps from your mobile Samourai Wallet:
- Select the blue “+” sign and then the “Whirlpool” button
- This will launch the mobile Whirlpool client, again select the “Whirlpool” button
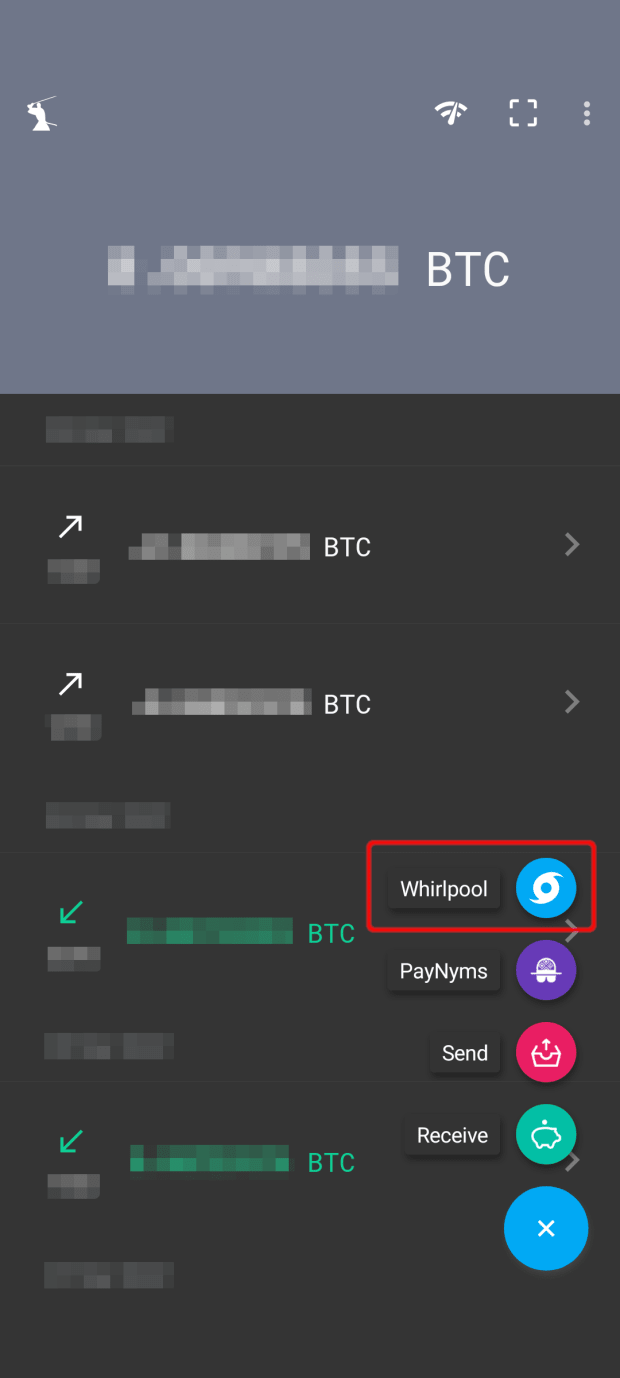
- Select the option to “Mix UTXOs”
- A list of the available UTXOs from your deposit wallet will be displayed. Select the UTXOs you would like to mix and then click on “NEXT.” Keep in mind that if any of these UTXOs have a history that you do not want connected on-chain, you should consider selecting them independently of one another.

- Select the cycle priority (miners fee), select the pool size appropriate for the amount you are mixing and select “REVIEW CYCLE DETAILS.”
- You will be presented with the details of the TX0 that you are about to make. Select “BEGIN CYCLE” once ready and the transaction will be built and then broadcast from your RoninDojo Tanto to the Bitcoin network.
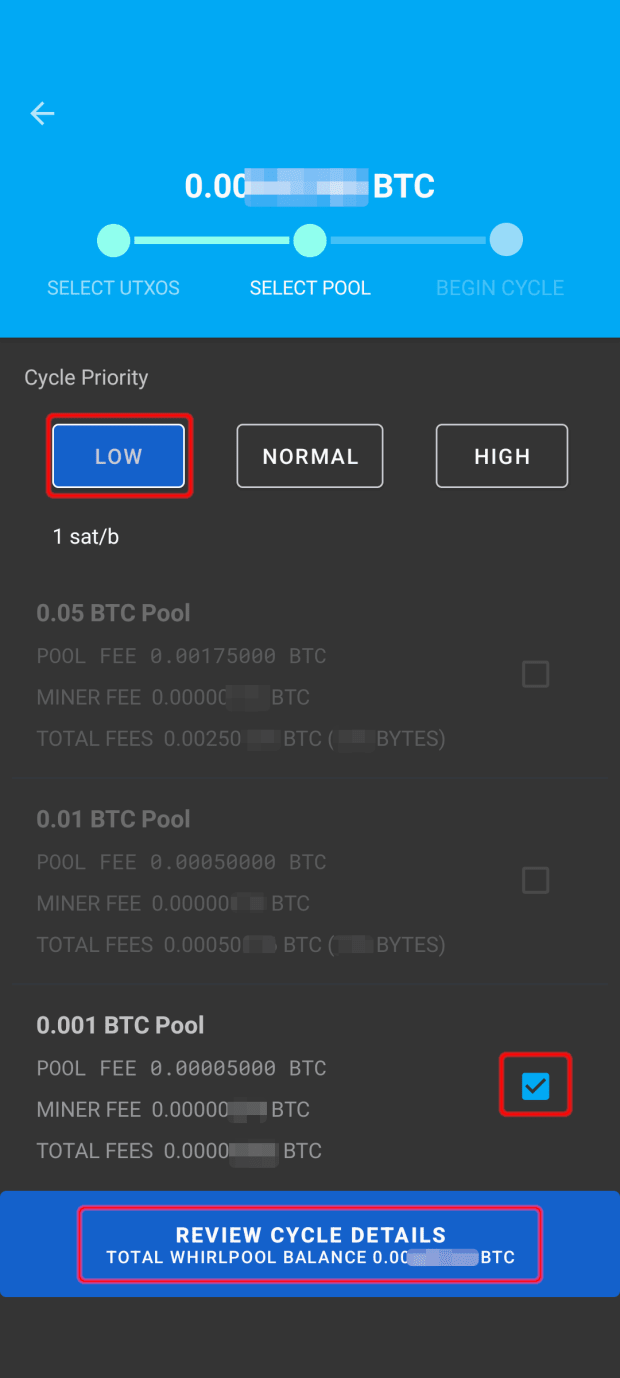
Now your resulting UTXOs from the TX0 will be registered as available inputs to new mixes. You can now close your mobile Samourai Wallet application and the desktop Whirlpool GUI will keep your resulting mix outputs available as free riders for future mixing rounds.
Conclusion
Now you have seen how easy it is to connect and configure your own Bitcoin full node, how to install and configure a mobile Samourai Wallet, and how to connect them both to a desktop Whirlpool client. With this kind of setup you are able to bring the power of a ZeroLink CoinJoin implementation with you in your pocket while communicating back to your own node at home over Tor. You can also connect with peers to make collaborative transactions that preserve the anonymity gained in Whirlpool and break on-chain heuristics.
Whirlpool
Every Whirlpool transaction has five inputs and five equal-sized outputs. There is nothing about any particular output that makes it any more likely to belong to any particular input than any of the other outputs.
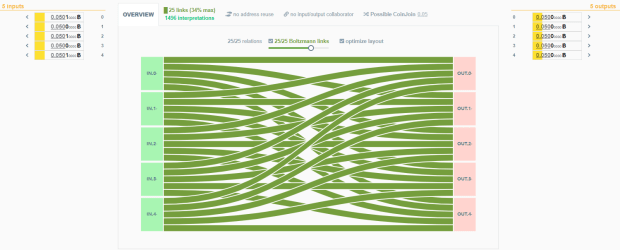
There are strict rules that are enforced by the blinded Whirlpool coordinator such as:
- Each CoinJoin transaction will have five inputs
- Each CoinJoin transaction will have five outputs
- No address reuse
- All of the outputs from a CoinJoin transaction will be the same denomination
- UTXOs do not cross from one pool to another, 0.05 BTC UTXOs do not get used as inputs in 0.01 BTC sized Whirlpool CoinJoin transactions, for example
- No single wallet may have more than one input to a transaction. So all five inputs must come from different wallets.
- No two outputs from a CoinJoin transaction may be used together in a future CoinJoin transaction
- Every CoinJoin transaction will have a minimum of two fresh participants to the liquidity pool and a maximum of three
- Every CoinJoin transaction will have a minimum of two re-mixing participants and a maximum of three. These participants may be referred to as “free riders.”
- Fresh participants cover the miners fee
- Re-mixing participants continue mixing for no additional fee
- Only UTXOs from a previous CoinJoin transaction (free riders) or UTXOs from a Transaction Zero (TX0) (fresh participants) will be allowed as inputs.
Cahoots Post-Mix Spending Tools
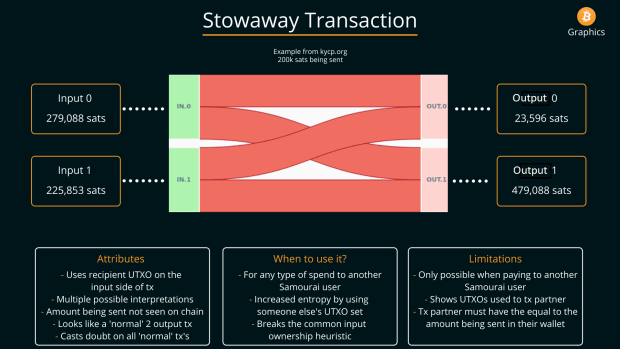
Stowaway transactions are collaborative transactions made between the sender and receiver that obfuscate the amount being spent.
A Stonewall transaction is attempted by default when spending from your post-mix wallet. This transaction looks identical on-chain to a collaborative StonewallX2 transaction.
A StonewallX2 transaction looks identical on-chain to a Stonewall transaction but is made between two peers and can be spent to a third party (check out this guide to StonewallX2 transactions).
Check out a general guide on collaborative cahoots transactions here.
Collaborative cahoots transactions are made with PayNyms, and each instance of Samourai Wallet gets a unique PayNym. PayNyms can send messages to each other to build these collaborative transactions over the Soroban comms layer which is encrypted over Tor by default. Sparrow Wallet has also implemented Whirlpool, PayNyms and BIP47. So even if you do not have an Android mobile device, you can still gain access to these powerful privacy tools by installing Sparrow Wallet on your PC.

Being able to make these kinds of transactions from a mobile wallet or desktop wallet that communicates back to your own Bitcoin full node (the Tanto) over Tor is a massive step toward guarding your privacy, being your own bank and using the best privacy tools available today for your Bitcoin transactions.
To learn more about RoninDojo and to order your Tanto, visit its website at ronindojo.io. When you want FOSS software with a laser focus on privacy, this is the sharpest tool available for your toolbox.
This is a guest post by Econoalchemist. Opinions expressed are entirely their own and do not necessarily reflect those of BTC Inc or Bitcoin Magazine.

