How To Heat Your Home With Bitcoin Mining
This guide walks you through integrating a bitcoin mining rig into your home’s HVAC system, recapturing heat from the process and saving money.
It is easy to forget, but innovation in Bitcoin is not purely digital.
Most see our “magic internet money” as something purely esoteric, but there is one aspect of our ecosystem that squarely straddles the line between the digital and the physical: bitcoin mining. To the layperson, bitcoin mining is an alien phenomenon — you buy a strange looking metal box, put it in a warehouse somewhere and consume significant amounts of electricity. However, to tinkerers, hobbyists, entrepreneurs and adjacent industry professionals (in the farming, real estate and oil and gas sectors, for instance), bitcoin mining is an opportunity to add efficiency and margin to highly-competitive spaces while recapturing costs and waste.
In that spirit, what follows is a simple framework for using bitcoin mining to add warmth to a residential home, keeping in mind that the concerns of a warehouse or a hash hut are different from those of a home. Where you would try to squeeze every terahash from a machine in a hosting facility, our concerns in a house revolve around safety, sound, convenience and cost recapture in residential heating.
A Simple Framework
We are going to integrate bitcoin miner heat output (a Bitmain S9, in this case) into our HVAC air return. The general thought is that it will accomplish two things: One, it will constantly “drip” heat into our HVAC system, which should, in theory, constantly push a low volume of warm air into the house without spinning up the HVAC system, and two, when the heating system and HVAC fans spin up, our miner should supplement the heat production of our heating system, requiring less energy use (gas in our case).
Of course, a home miner can use a new-generation machine for the same purposes I’m detailing above, but for the sake of accessibility and startup cost, I adore the older generation S9 as a tool for learning and tinkering. They are physically robust, easy to acquire and can be run on your standard 110-volt electric system while tuned with Braiins firmware for greater control.
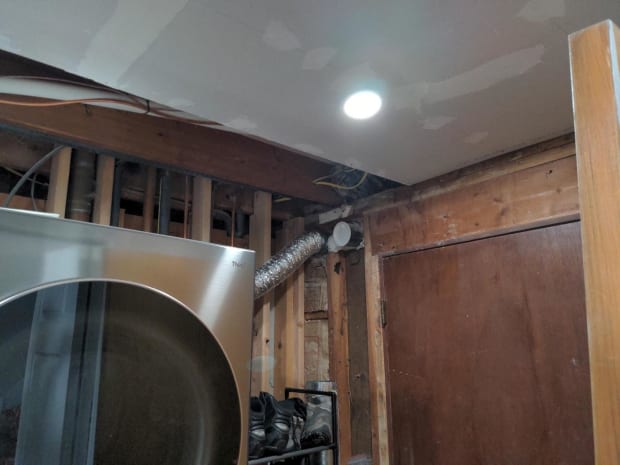
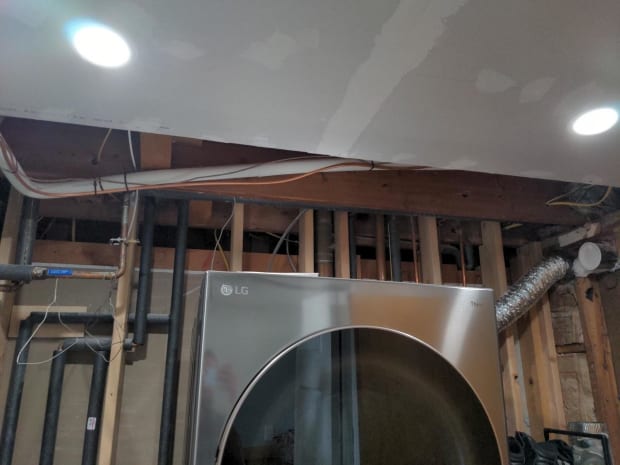
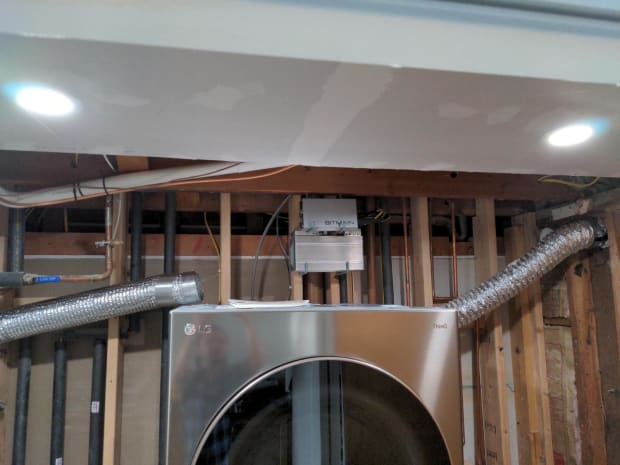
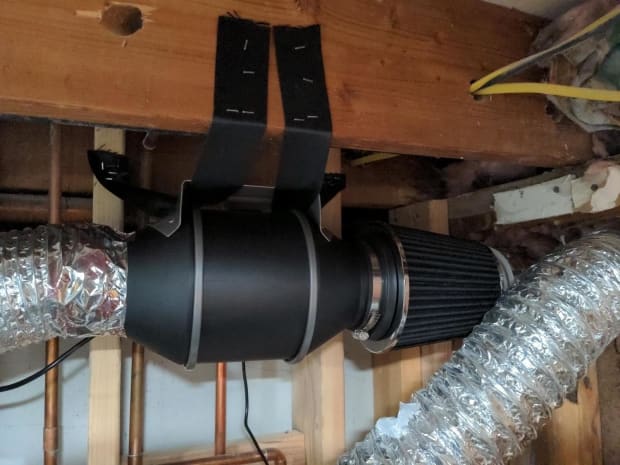
My particular plan is to use the space above my dryer to mount both the miner and the ducting required. In the interests of sound mitigation and sufficient cooling through the ducting, I’ll be removing the stock fans from the S9 and using an inline fan (an AC Infinity CLOUDLINE S4, which goes for around $100 at time of writing) to pull air from an outside vent, push it through the miner, then dump it into my HVAC return duct.
What We Will Need
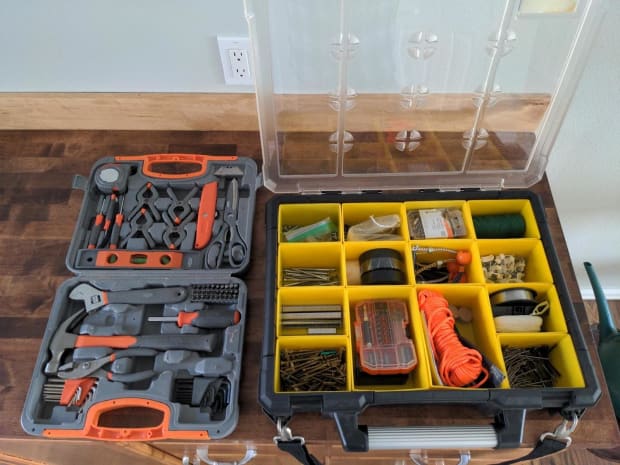
You will modify what I share below to fit your own space and budget limitations, but at minimum you should have access to hand tools, gloves, a drill and some variety of cutting tools to grind/shape thin metal.
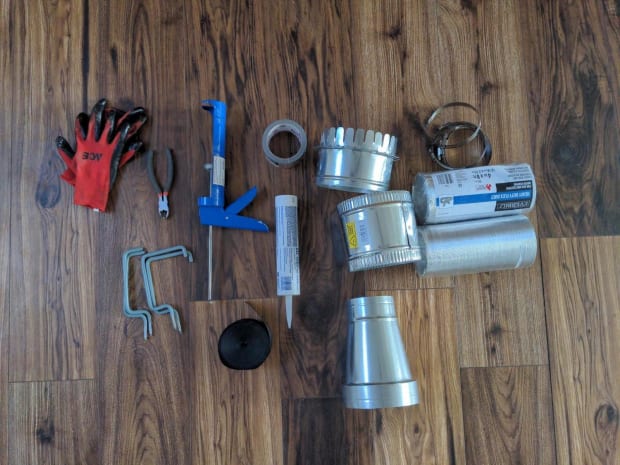
You’ll also need to acquire the correct ducting (insulated, foil or smooth to your preference), for your purposes, a starting collar to port into your return, the correct reducers or collars to make any size changes, sealant and tape for a final airtight seal and mounting hardware for your fan and miner.
Ducting Installation
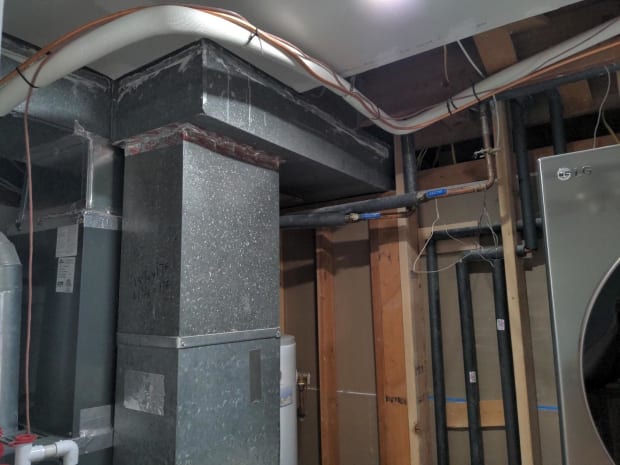
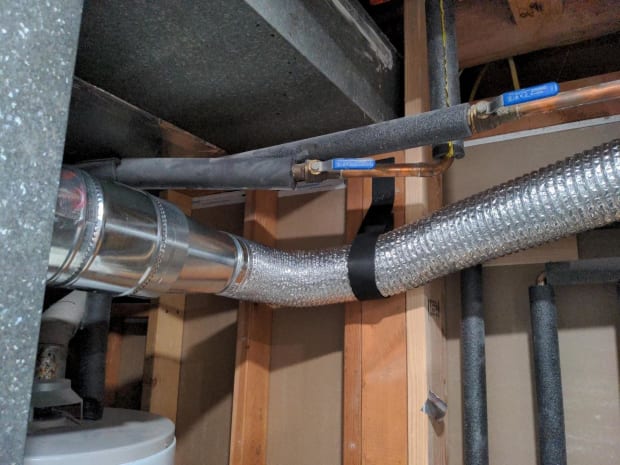
The most difficult part of the build was cutting a hole into the HVAC return to mount the starting collar (where the heat is actually dumped into the system from the miner).
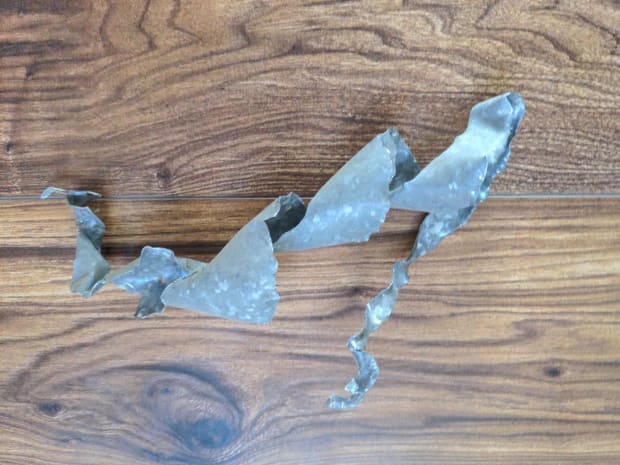
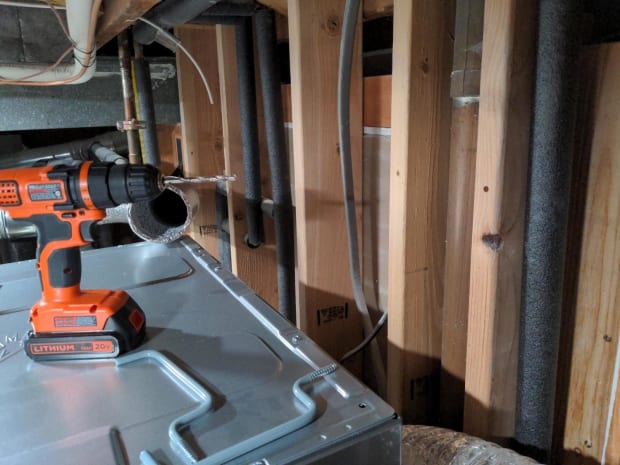
I began by tracing the starting collar shape on the return, then drilling a hole into the middle of the traced circle and, while wearing gloves, cutting in an expanding circle until I hit the traced line (the outer edge). The work was cramped, uncomfortable and produced a gnarly little piece of metal that attempted to cut me at every pass. You must wear gloves — I repeat — you must wear gloves. It is also advised to use proper tin snips and not the dinky, home DIY snips that I used.
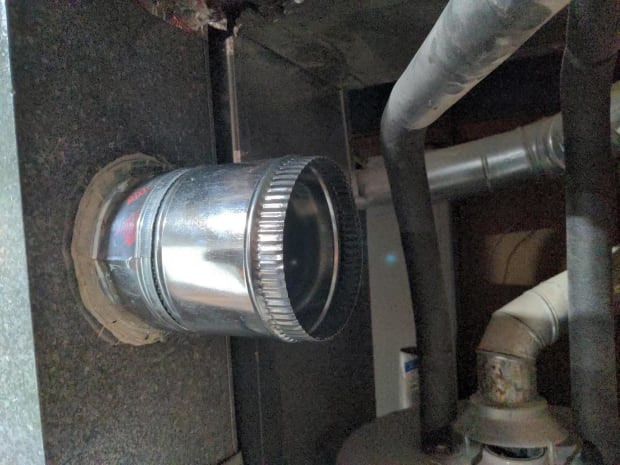
With a circular hole cut into my HVAC return, I could rough mount my starting collar. Additional grinding, cutting and pulling were necessary to get the collar to mount flush on the return. Once it was set, I could reach through the collar and bend over the tabs inside of the collar to hold it in place. That was followed by a layer of HVAC sealant and tape to set the piece in place securely.

With the hard part of the build complete, I began mounting the adapters and ducting. I used a simple strapping technique to hang the ducting from the exposed studs. This allows easy mounting and adjustment for any fine tuning in the future. Be sure to secure your duct attachment points with HVAC clips and to cover them with tape to avoid any air leakage or whistling sounds when the system is running.
Mounting Your ASIC
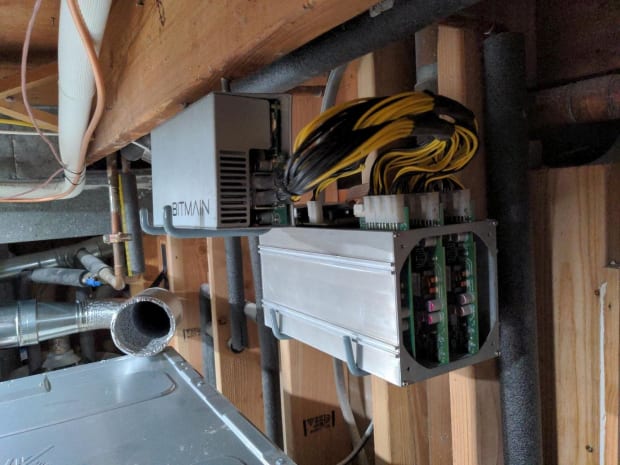
Working toward our air inlet, the plan is to mount the ASIC above the washer/dryer unit using pieces from a generic rubberized wall mounting kit that can be found at any hardware store. Amazingly, the generic mounts fit both the miner and the power-supply unit (PSU) in a way that allows both wall and ceiling attachment.
Final Attachments And Inline Fan Mount
You may be wondering how we are going to mount our ducting to our ASIC. For this, we take a detour to the 3D printer to produce two of these (freely available). If you don’t have access to a 3D printer, various mounts can be found for purchase with a simple search online.
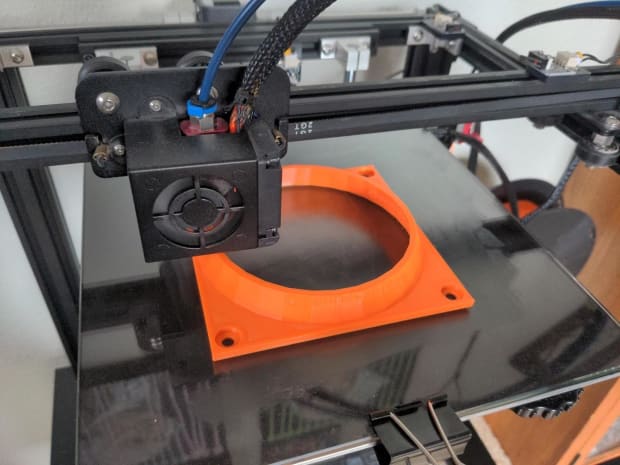

The final piece of our system is the mounted inline fan. I’m using the same strapping technique through the available mounts on the fan as I did on the ducting as I believe this will reduce the likelihood of any unwanted vibration in the system.
If you’re using the same wiring technique that I’ve highlighted previously in The Apartment Dweller’s Guide To Mining Bitcoin,” you’ll want to mount your fan near your machine to use the available plug and have everything neat on a single outlet.
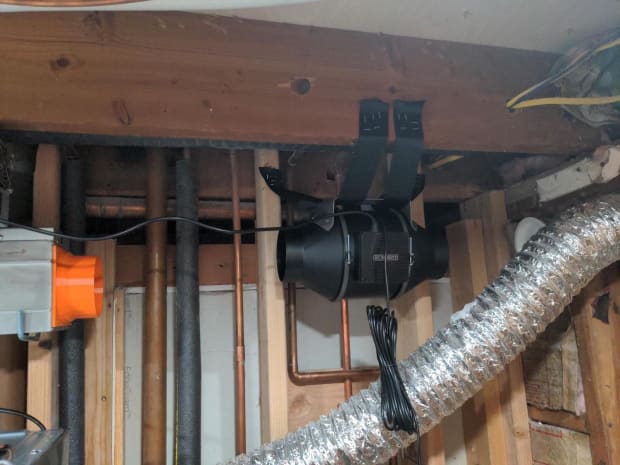
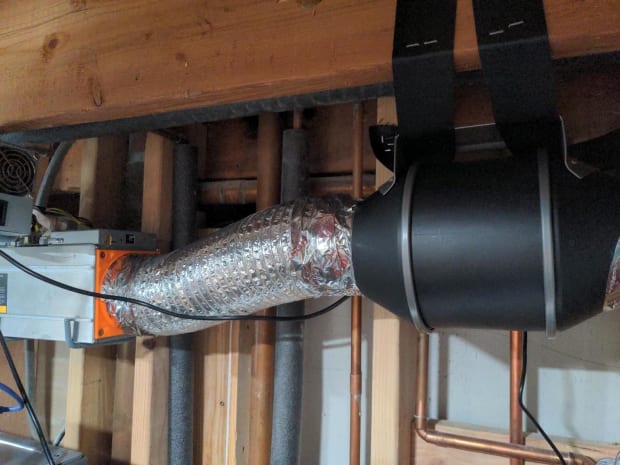

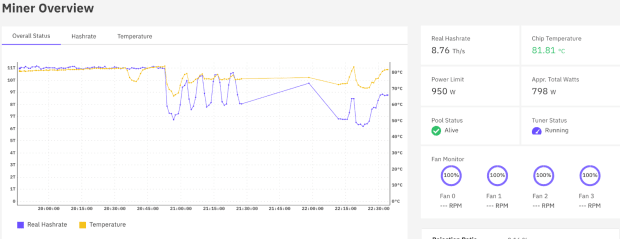
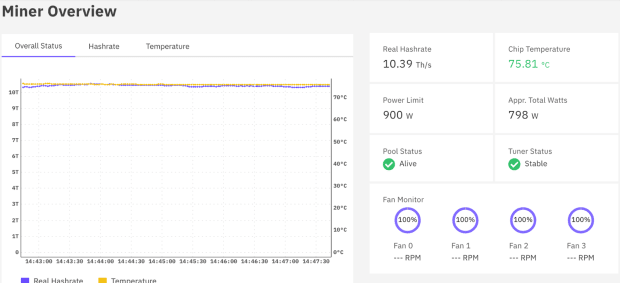
With the ASIC and fan mounted and wired, we can start testing the system and begin hashing. Changing settings to run without fans is incredibly easy in Braiins. With the inline fan on 90% power and the ASIC underclocked to 900 watts, I let Braiins’ auto tuning work its magic. What I first noticed was that the tuning took an incredibly long time while running without fans. I suspect pulling air from the outside 24/7 was confusing the tuning system. While it was winter in Colorado and the air is consistently cold, due to our dry climate we get large swings in ambient temperature over the course of the day. This wasn’t making the auto tuning very happy and it struggled to generate a stable profile.
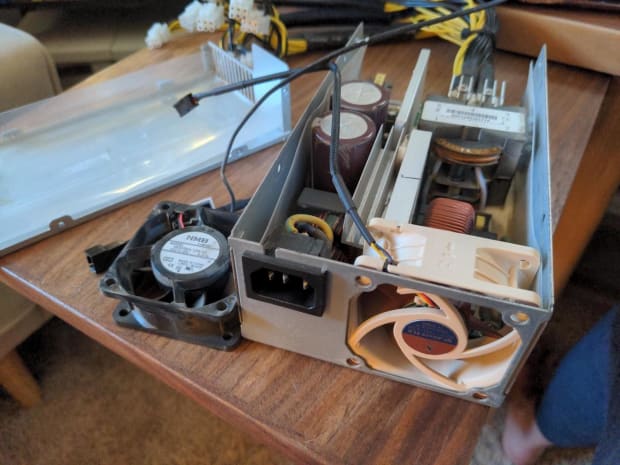
Additionally, one of my goals for this system was to be as quiet as possible. I noticed that the inline fan was very, very quiet. So much so that I began to hear another sound, the fan on the PSU. Yes, the fan on the power supply was louder than the inline fan pushing air through the ASIC.
To remedy these problems, I made two modifications to the system. The first was to detach our inlet from the outside ambient air, and to instead mount an automotive cold air intake directly to the inlet of the inline fan. By drawing air from my laundry room directly, I am able to keep a more consistent input temperature, which assisted greatly in tuning via Braiins. Also, by drawing air from the inside, I don’t create a pressure differential in my house by pulling air from outdoors into the home via the inline fan. I don’t believe this will create issues at small scale, but am happy to avoid any problems that may arise from this going forward.
Additionally, I purchased a 60-millimeter Noctua fan to replace the stock 60-millimeter PSU fan. This required a minor electrical intervention as the stock fan has two pins and the Noctua has three. I simply attached the main black and red power lines from the Noctua to the PSU, and left the third wire unattached. The fan runs perfectly at full speed and sound is reduced.
In Summary
After our initial construction and final tuning, the system has stabilized at around 800 watts consumption and is consistently producing both ambient heat in the home and about 10.25 terahashes per second. I believe the modified PSU fan is our limiting factor in power, as the Noctua doesn’t push as much air as the stock PSU fan. This isn’t a great concern to me as my goal isn’t to squeak as many hashes out of my machine as possible. Rather, my goal is to integrate bitcoin mining into a residential setting while maintaining quality of life (sound and safety of living space) and to repurpose the waste heat usefully.
I believe I’ve accomplished both and hope you will feel confident in building out your own systems of ASIC home integration. These are the early days of home mining. Residential products like the Upstream Data Black Box are in their infancy and open the door to entirely new and creative categories. Bitcoin mining isn’t just for the big boys, and you’re more than welcome to join the conversation as we build and learn together.
Happy building.
This is a guest post by Rob Warren. Opinions expressed are entirely their own and do not necessarily reflect those of BTC Inc or Bitcoin Magazine.


