From Delivery To Hashing In 15 Minutes: Setting Up The FutureBit Apollo Node And Miner
This guide walks you through setting up the FutureBit Apollo Bitcoin node and miner, letting you mine bitcoin at home within 15 minutes.
This is a guide for getting started with the FutureBit Apollo Bitcoin node and miner. The Apollo is a full archival Bitcoin node, currently running Bitcoin Core version 22.0.0. Additionally, the Apollo is a Bitcoin miner equipped with 44 ASIC chips capable of producing about 3 terahashes (Th) in mining capacity. The Apollo is built on a revamped platform featuring a six-core CPU, 4 gigabytes (GB) of RAM, and a 1 terabyte (TB) solid-state drive (SSD).
The Apollo can go from delivery to hashing at a pool of your choice in less than 15 minutes and it can sync the entire Bitcoin blockchain in two days.
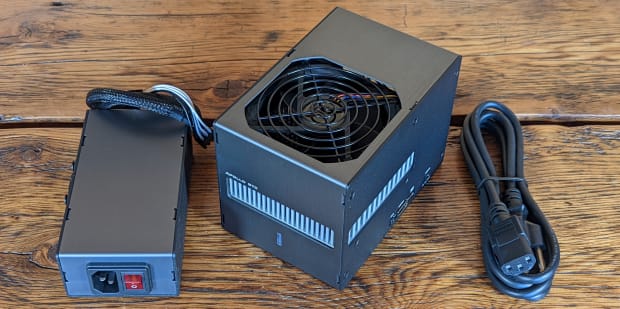
The Apollo brings the full Bitcoin ecosystem back into one device. The wallet, the node and the miner are all contained in one cohesive device that anybody can run quietly on their desk. As the technology in Bitcoin has advanced over the years, there has been a fragmentation from the way users interact with the Bitcoin software — dedicated wallets, nodes and mining companies/projects have evolved from what was once all running in an application on a personal computer.
As large mining pools draw in more hash rate, the Bitcoin network becomes more centralized and escaping regulatory capture becomes more difficult. Not everyone can or will want to run industrial-grade miners in their homes. The more-than-80 decibel (dB) noise levels and the greater than 150° F temperatures can be difficult to manage. Although there are a great many resources available for DIY enthusiasts interested in joining the Bitcoin home mining renaissance, the Apollo is designed with a more broad user base in mind. The Apollo runs quietly at about 25 dB in “ECO” mode, is quick to install and connect to a pool and the interface makes interacting with it user friendly.
To hear about it straight from the source, check out this guest segment from “The Hash Cast” with FutureBit founder John Stefanopoulos talking about solo mining block finds and decentralizing hash power.
This guide will show you how to get started with a FutureBit Apollo Full Package model. Topics covered here are:
When you order an Apollo, or any Bitcoin-related materials for that matter, consider using a P.O. Box to guard your privacy.
Technical Specifications Of The Apollo
- Size: 4” by 6” by 4”
- Hash board: SHA-256 mining performance from 2 Th to 3 Th stock, up to 3.8 Th achievable with an external, more than 300 watt power supply
- Power: 125 watts in ECO mode to 200 watts in “TURBO” mode
- Fan: 1,000 to 5,000 RPM low noise dual ball bearing fan (under 25 dB in ECO mode)
- Connectors: Audio in/out, HDMI out, USB Type-C, 5-volt DC out, two USB 3.0, Gigabit Ethernet and USB 2.0 on the full-package version
- Power Connectors: Two six-pin 12 volt PCIe power connectors
- Power Supply: 90 to 240 volt AC input at 1.8 amps, 12 volt output at 16.7 amps (max. 200 watts)
Unboxing And Setup
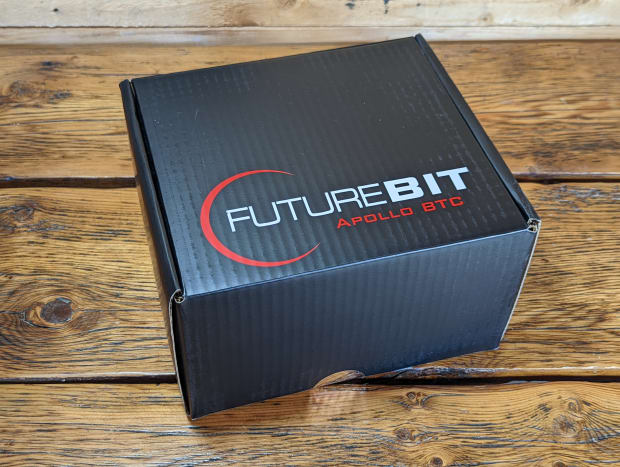
The Apollo ships in an inconspicuous brown box measuring 10″ by 8″ by 5″. There are no company stickers, logos or designs on the box or any indications that there is Bitcoin-related contents within.

Inside the brown box is the FutureBit-packaged box which is sealed shut with a foil sticker. Inside this box is a foam-packed controller, power supply, power cable and instruction card.
The included power supply has two six-pin directional connectors that plug into the back of the Apollo. This will achieve about 3 Th in hash rate. If you want to achieve the full 3.8 Th, then you need to get your own power supply that is rated for more than 300 watts. If you want to connect your Apollo to a dedicated monitor, mouse and keyboard, then connect those devices now. For a wired internet connection, plug in an Ethernet cable to connect to your local network. Then simply connect the included power cable to the other side of the power supply and plug it into an outlet and you are ready to power on the Apollo.
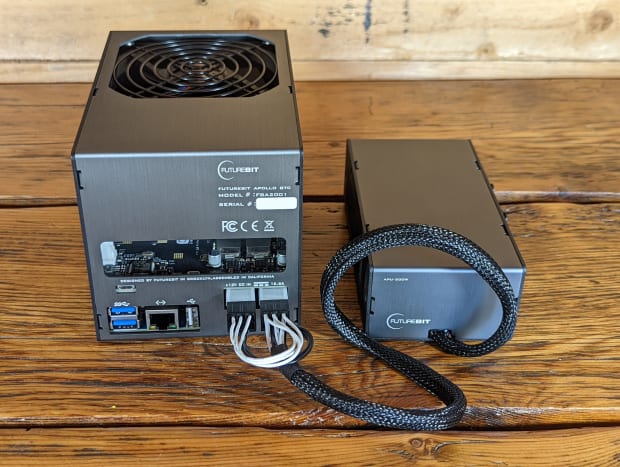
There are additional connection types on the Apollo to suit a range of configuration options. You can connect a monitor to the HDMI out port and a USB keyboard/mouse to the USB ports. There is also a high speed USB-3 and USB-C port for optional peripherals. If you don’t want to use an Ethernet cable, you can connect to your network with a modern dual band AC WiFi controller. Alternatively, there is a dedicated 1 Gigabit Ethernet port, which is how it was configured in this guide. You can also connect bluetooth devices, such as the Bluetooth Ledger hardware wallet, as Bluetooth 5.0 comes built in. The Apollo also has an audio in/out port.

Once the Apollo powers on, the light indicator on the front will flash red and blue for a few minutes while the device goes through its initial configurations automatically. After a few minutes, the light will steadily flash red and the cooling fan will then start spinning, this indicates that the Apollo is now hashing and ready to configure.
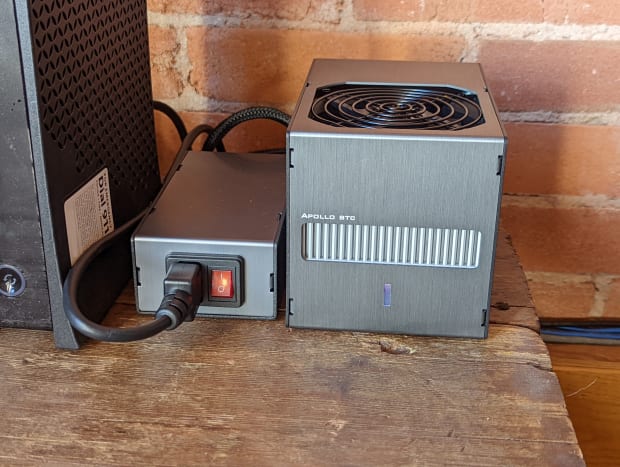
Using the included instruction card, you can now navigate to the support page to start the configuration.
Connecting To A Bitcoin Mining Pool
This section will show you how to connect to a Bitcoin mining pool. After the Apollo completed the automatic initial configuration, it started hashing. This is indicated by the steady flashing red light on the front of the device and the cooling fan running. More detailed instructions can be found on the FutureBit support page.
If you connected a monitor, keyboard and mouse to the Apollo then you should be greeted with a login screen after all the system level configurations are complete. The password should be “futurebit123.” The Apollo Operating System (OS) is built on a Linux distribution called “Armbian.” You can complete the following steps in this section on the Apollo desktop environment if you want or you can also do this remotely from another computer on the same local network. However, the next section will cover connecting the Apollo to a desktop wallet on a remote computer and that will not be done on the Apollo’s desktop environment.
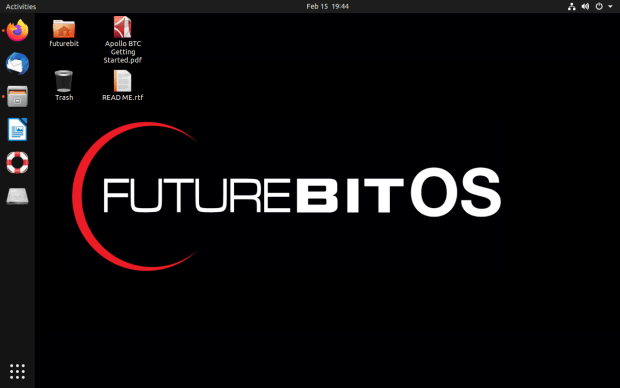
Otherwise, if you are running the Apollo remotely, then you need to find the local IP address on your network. The easiest way to do this is by logging into your router and checking the list of devices under the DHCP leases section.
Your router should have a sticker with the local IP address needed to login along with the password. If not, the directions are usually pretty easy to find with an online search for your manufacturer’s router. Typically, you can just type “192.168.0.1” or “192.168.1.1” or “10.0.0.1” into your web browser and that will bring you to your router login page. From there the username/password can vary depending on manufacturer but they are usually something like “admin/admin” or “admin/1234” or “admin/password.” Alternatively, programs like AngryIP may be used to scan your network for all active IP addresses. You should be able to find the IP address for your Apollo next to the device named “futurebit-btc” in your DHCP leases list.
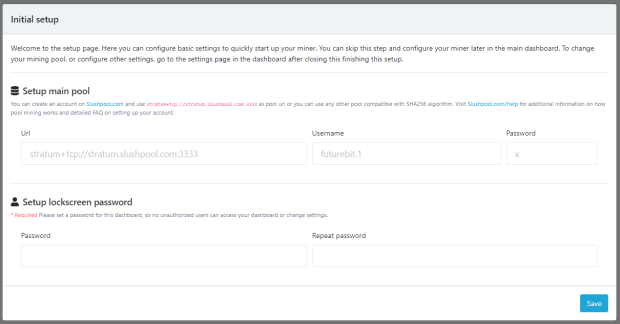
Once you have the local IP address for your Apollo, enter it into your favorite web browser on a computer connected to the same local network. You should be looking at a screen like the one below. This is asking you what mining pool you would like to join. You have many options when it comes to Bitcoin mining pools. You can check out a list of the top-15 Bitcoin mining pools by size on the btc.com website.
Slush Pool is a great pool to get started with, it was the first Bitcoin mining pool, it supported small blockers during the Blocksize Wars, it was the first pool to signal for Taproot activation, it has a user-friendly dashboard with detailed data points, its mobile app allows users to monitor hash rate while on the go and it has a Pay Per Last N Shares (PPLNS) payout method. When blocks are found on Slush Pool, you get rewarded in proportion to your average shares.
Alternatively, CK Pool is an option if you want to take a gamble and see if you can be the lucky miner who solves a block. With most Bitcoin mining pools, when a pool participant finds a block, all of the miners in the pool get a piece of the rewards minus a percentage fee that goes to the pool operator. With solo CK Pool on the other hand, when a pool participant finds a block, they get 98% of the entire block reward (subsidy and transaction fees) and the pool gets 2%.
In this guide, CK Pool was used. The concepts presented here are mostly the same for other mining pools. Check out a few different pools to see which one is a good fit for you.
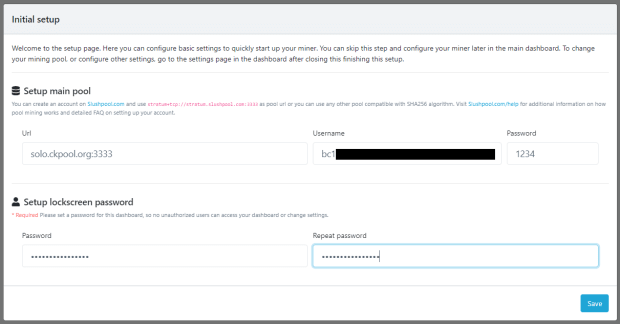
- You want to take the mining pool URL and copy/paste it in the “URL” dialog box on the Apollo initial setup screen.
- Enter the “username” in the next dialog box. If you’re using Slush Pool, this will be the same username used for logging into your Slush Pool account. If you are using CK Pool, this will be the Bitcoin address you want the rewards deposited to if you solve for a block. In either case, you can append the username with “.worker1,” “.worker2,” etc. to distinguish between multiple miners you may have.
- The “Password” entered in the next dialog box has no security consequences, it is merely a method for controlling spam pings to the mining pool’s server, this can be something as simple as “1234.”
- Below, in the next two dialog boxes however, this password is sensitive in terms of security. This password is the one that will allow access to your Apollo dashboard. Using high-entropy passwords is a good practice.
- Once you are finished, click on “Save” in the lower right-hand corner.
Next, you should be brought to your Apollo lock screen. Enter the password you created for accessing your Apollo dashboard.
You should now be looking at your Apollo dashboard. Congratulations, you’re all finished!
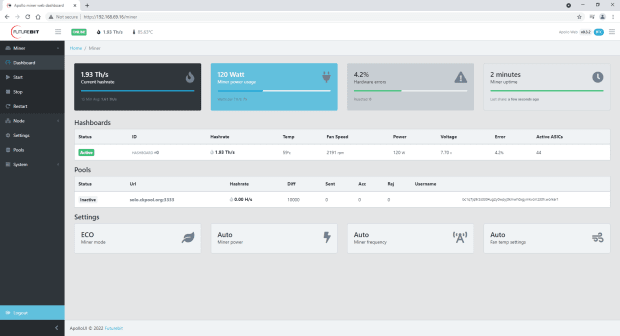
On the left-hand side is a vertical menu, here you can click on “Miner” then “Dashboard” to see stats on your mining activity such as current hash rate, wattage consumption, share rejection rate, uptime, temperature, fan speed and more.
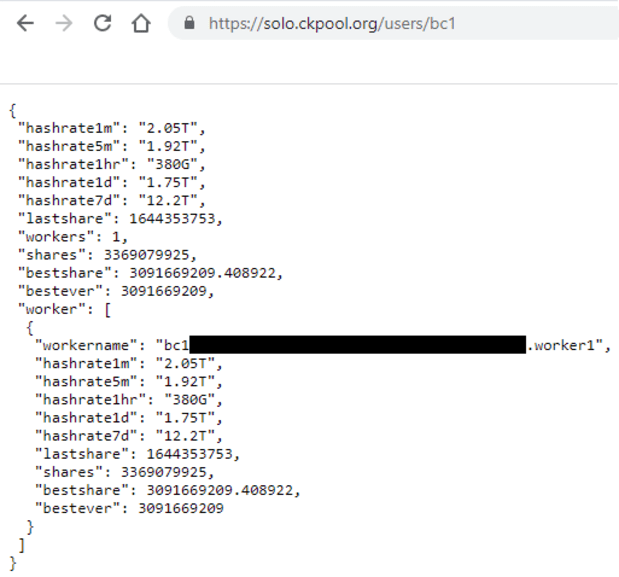
This is a good time to check your mining pool dashboard to see if your hash rate is hitting the pool. If you are using CK Pool, the dash board is pretty simple with just the basic information printed. You can use the URL “https://solo.ckpool.org/users/YOUR-BITCOIN-ADDRESS” to monitor your stats.
Or if you are using Slush Pool, you’ll have many more details and features in your dashboard.
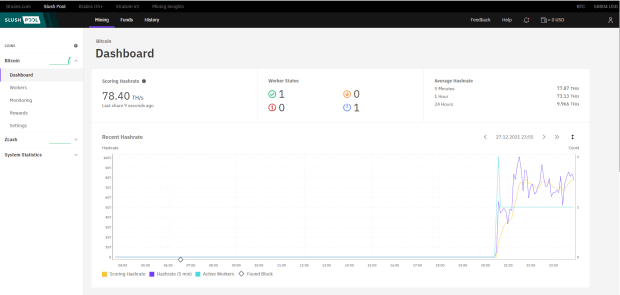
Once you see hash rate showing up in your mining pool dashboard, that’s it, you are finished with your miner setup. You can “Start,” “Stop,” and “Restart” your miner from the left-hand side menu as well.
Back in your Apollo dashboard, you can click on “Node” then “Dashboard” and then check the status of your full Bitcoin node. When the Apollo did its initial automatic configuration, one of the processes was starting up your Bitcoin node. You will see that it has already started downloading the entire Bitcoin blockchain all the way back to the very first block in January 2009. The initial blockchain download will take roughly two days, it took 52 hours and 20 minutes in this demonstration. This process will just continue running in the background until it is finished.
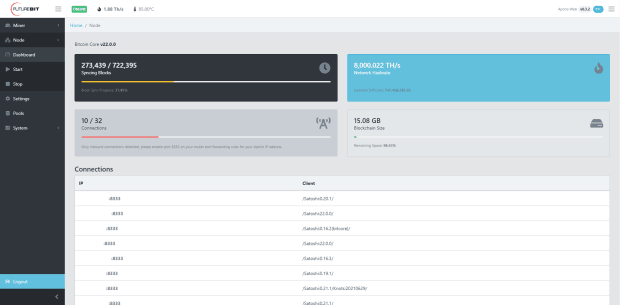
You can “Start” and “Stop” your node from the left-hand side menu as well.
Leave the settings of the Apollo on ECO mode while it is completing the initial blockchain download. Once the Apollo is fully synchronized, then you can navigate to the “Settings” tab in the left-hand menu and there you can change the configuration to “Balanced” mode, which will run the Apollo making a good compromise between hash rate, efficiency and noise. Running the Apollo in “Turbo” mode will be the least efficient, but its hash rate will be the highest. This mode is only recommended for expert users, and you should monitor your miner for possible overheating. The fan can get loud in this mode.
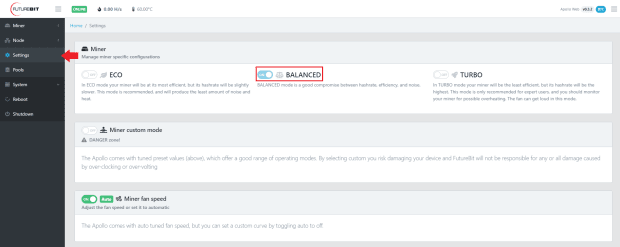
Otherwise, your Apollo is good to go at this point. You now have a full Bitcoin node and a miner running quietly. The next section will demonstrate how to connect the Apollo’s node to a desktop Bitcoin wallet.
Configuring Apollo As A Sparrow Wallet Backend
This section is done from a remote computer. If you used the Apollo desktop environment in the last section, you will now want to switch over to the computer on which you will install Sparrow Wallet. Sparrow Wallet is a Bitcoin wallet designed to be connected with your own node and run from your desktop or laptop computer. This is a user-friendly wallet with an intuitive interface and many advanced features for a range of capabilities. To learn more about Sparrow Wallet and for installation instructions, visit the Sparrow Wallet website.
Since the Apollo is running Bitcoin Core, this can be used as a backend for Sparrow Wallet so that you gain the ability to broadcast transactions from your own node and verify your transactions against your own copy of the Bitcoin blockchain. Otherwise, you would be reliant on trusting someone else’s node, such as a public Electrum server.
Even though you have Sparrow Wallet installed on a different computer, you can still use the Apollo as a backend through remote procedure calls (RPC). You just need to open up the “bitcoin.conf” file and make a couple changes. For this demonstration, a SSH connection to the Apollo from a separate computer on the same local network will be used.
SSH Connection
If you are using a Windows desktop, a simple application called Putty can be used to establish the SSH connection. Putty also works on other OS platforms. Learn more about Putty here and download it here. Best practice is to verify the download, then run the “.msi” file and follow the install wizard prompts.

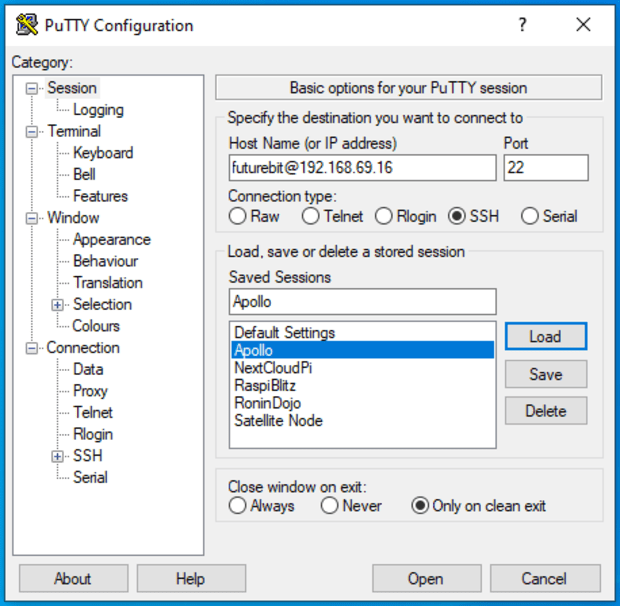
Once you run the Putty application, enter the local IP address of your Apollo in the “Host Name” dialog box, enter your user, which will be “futurebit,” then the “@” symbol, followed by your Apollo local IP local address. For example, all together, it should look like:
“futurebit@192.168.69.16.” Then select “Open” at the bottom. You can also save these settings so you don’t have to enter this information manually each time.
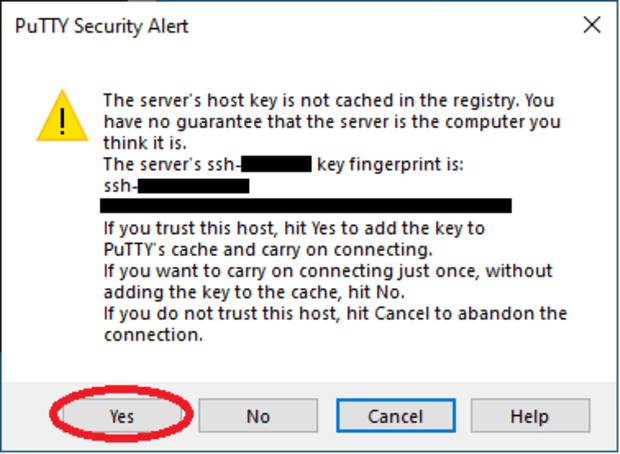
You may see a warning like this, select “Yes” to add the key to Putty’s cache.
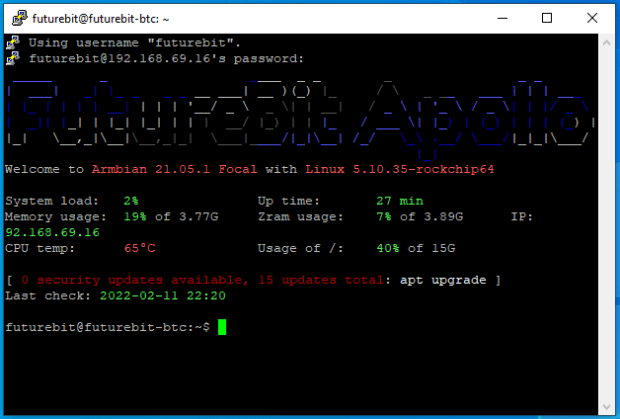
Next, you should be asked for the password, enter “futurebit123.”
Then you should be looking at a screen like the below. Do not run the updates! Doing that will brick your device and you’ll have to reflash the factory image. This is a known issue and will be corrected in a future update, you can read more about it here.
All you need to do from this point is add the RPC settings to the Bitcoin configuration file. First, change the directory to the location of the configuration file by running this command: “cd /opt/apolloapi/backend/node.”
And then this command will open that file in a text editor called “Nano”: “sudo nano bitcoin.conf”
Once you have the configuration file open, add the following lines:
rpcbind=127.0.0.1
rpcbind=192.168.69.16 (your Apollo local IP address)
rpcallowip=127.0.0.1
rpcallowip=192.168.69.12 (your desktop local IP address)
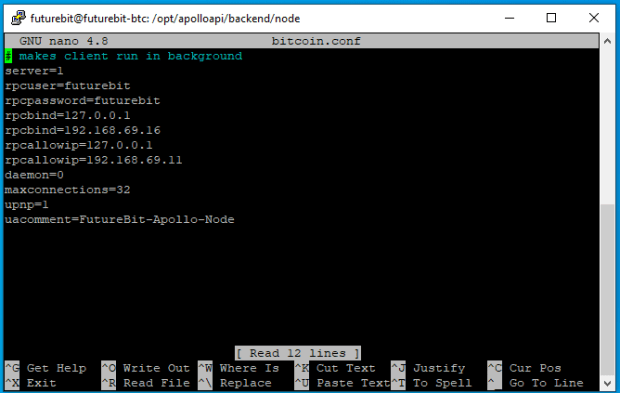
Then hit the control key and “x” at the same time, “y” for yes and press the “enter” key to save. Now you can exit your SSH session by running the “exit” command.
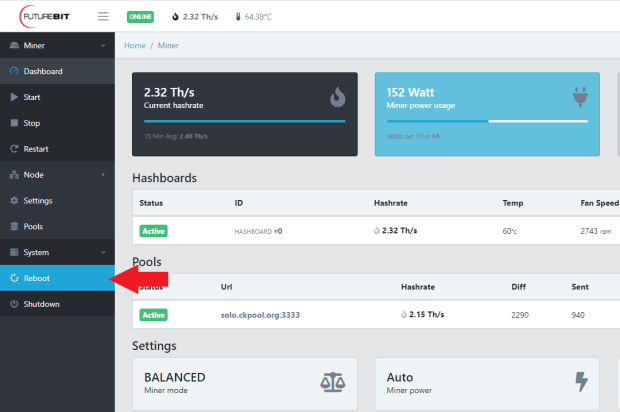
Back in the web dashboard, click on the “Reboot” button in the left-hand side menu. This will shut down and restart the Apollo and the changes made to the “bitcoin.conf” file will be applied.
Configuring The Apollo Bitcoin Node With Sparrow Wallet
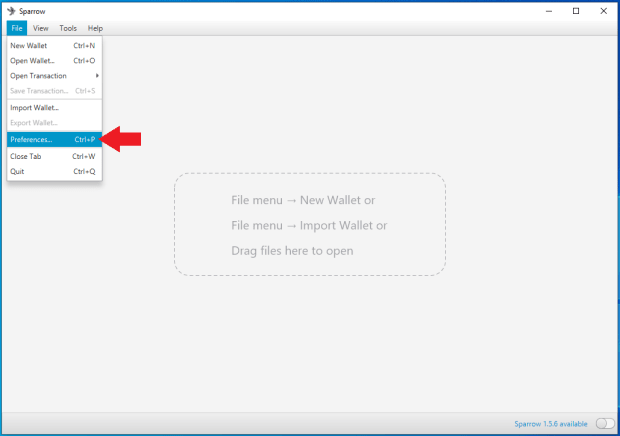
Now you are ready to configure Sparrow Wallet to talk to your Apollo Bitcoin Core instance. Once you have Sparrow Wallet installed and launched, you will be presented with an empty user interface. Navigate to “File” then “Preferences.”
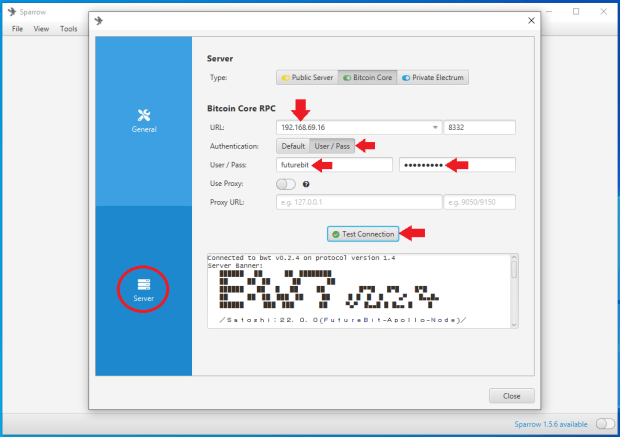
Then click on the “Server`” tab on the left-hand side. Click on the “Bitcoin Core” tab for the “Server Type.”
Enter the local IP address for the Apollo in the URL dialog box. Use the same username and password combination that was in the “bitcoin.conf” file, “futurebit/futurebit.” Test the network connection from Sparrow Wallet. If it’s good, you should see the green check mark next to “Test Connection” and some information populated in the dialog box below that. Then you can close that window.
Privacy note: Unfortunately, Bitcoin Core stores your public keys and balances unencrypted on the computer it is running on. Although your bitcoin are not directly at risk of theft, if this computer is regularly connected to the internet, it is at risk to hackers — which has the potential to make you a target if your balance and geographic location are discovered. To learn more about Sparrow Wallet best practices, check out this Sparrow Wallet resource.
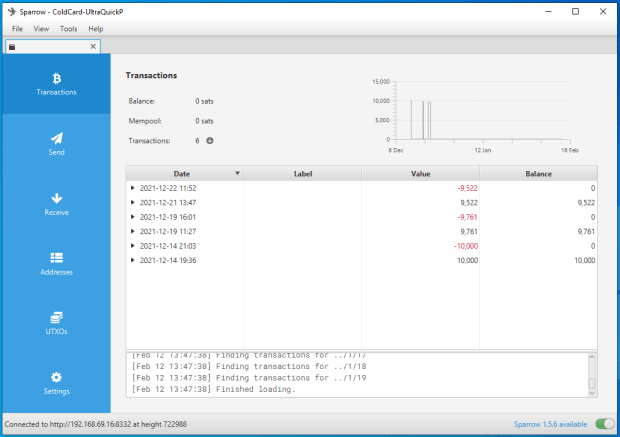
Once configured, you can now use Sparrow Wallet as a hot wallet, for Whirlpool CoinJoins, for a watch-only wallet, for an air-gapped hardware wallet and more, all configured to use the Apollo as the backend node, keeping your transaction inquiries more private and allowing you to broadcast directly to the Bitcoin network from your own node.
The best practice is to use the password feature in Sparrow Wallet to encrypt your wallet data file just in case any one gains access to this file. This way, they will not be able to open it without the password.
Conclusion
This guide has demonstrated unboxing, setting up, connecting and configuring the FutureBit Apollo in such a way that it is remotely accessed on a home network, mining on Solo CK Pool, and running the backend for a remotely-accessible Bitcoin desktop wallet. There will be more developments in store for the Apollo, so be sure to follow @FutureBit on Twitter for announcements and check out its website to order an Apollo for yourself.
This is a guest post by Econoalcehmist. Opinions expressed are entirely their own and do not necessarily reflect those of BTC Inc or Bitcoin Magazine.


